Showing posts with label Stamps. Show all posts

Tuesday, April 21, 2015

FOOTBALL PLAYER CARD

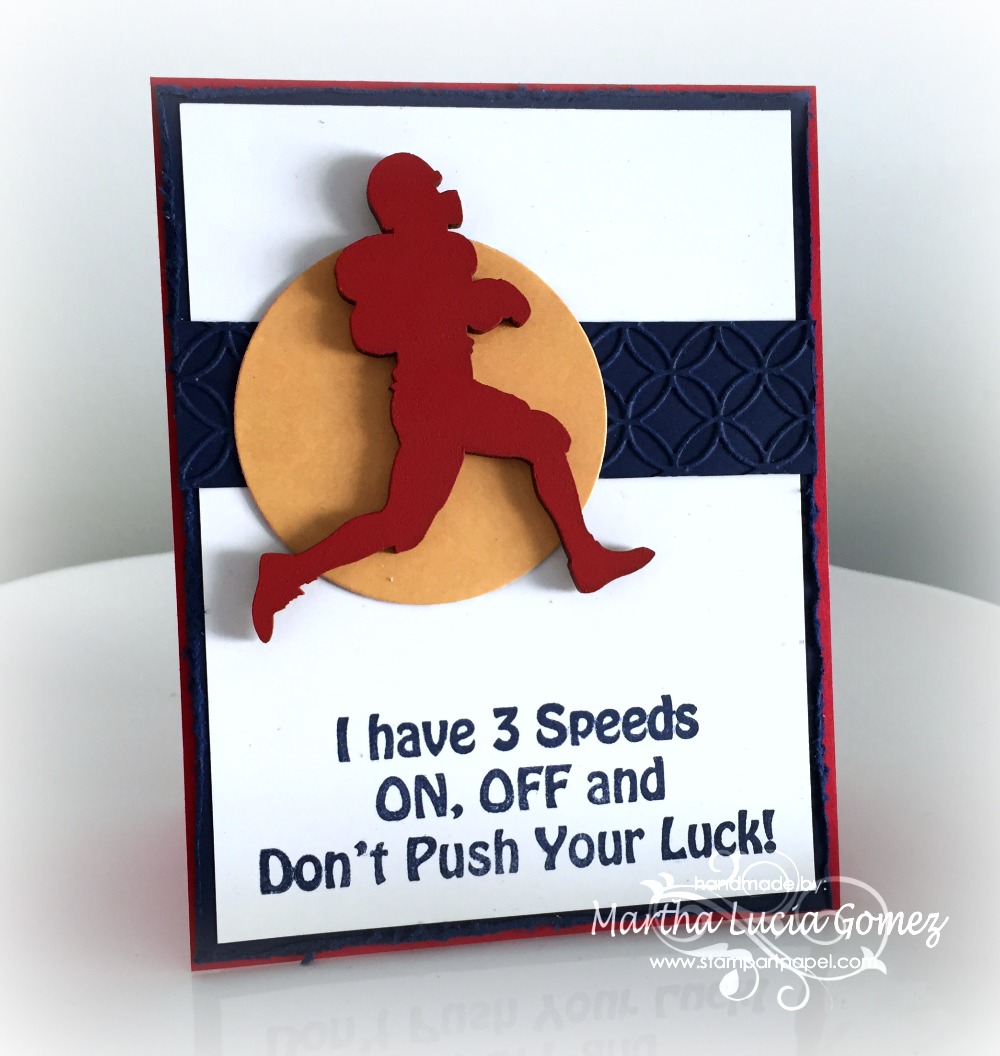
Hi everyone, Martha Lucia here with a "Football Player Card" to share with you. It's not common for me make masculine  cards but, I received this wonderful laser cut and I decided to use it immediately.

DON'T PUSH YOUR LUCK


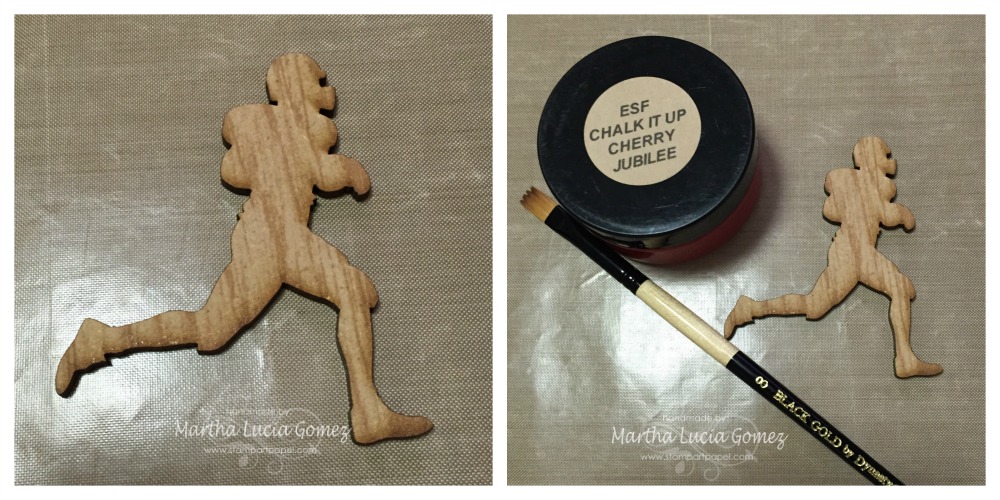
To create this project I am using a Football Player Laser Cut available in our store. It comes in natural wood, chipboard and cork.  I used the wood version and I decided to give it color using ESF Chalk It Up Cherry Jubilee.
DON'T PUSH YOUR LUCK  

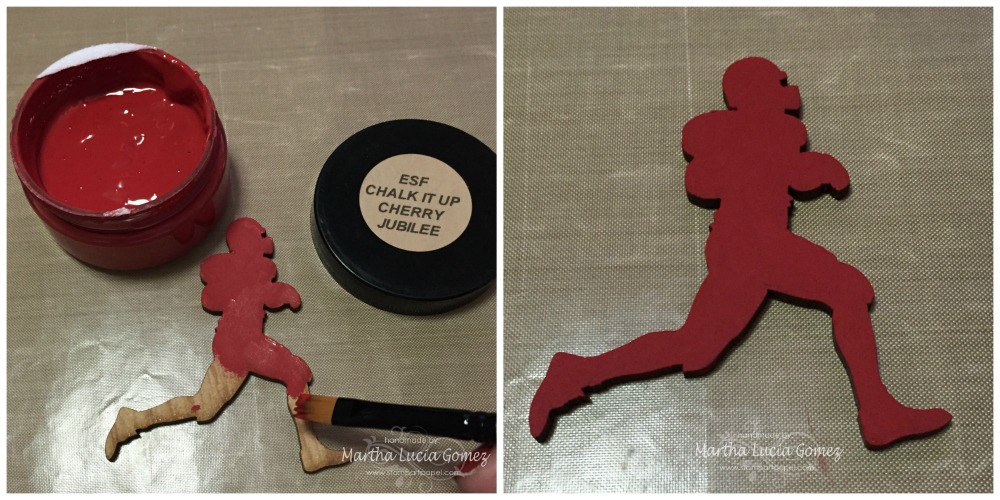
I applied the ESF Chalk It Up with a Black Gold by Dynasty paint brush and let it dry for a few minutes.
DON'T PUSH YOUR LUCK

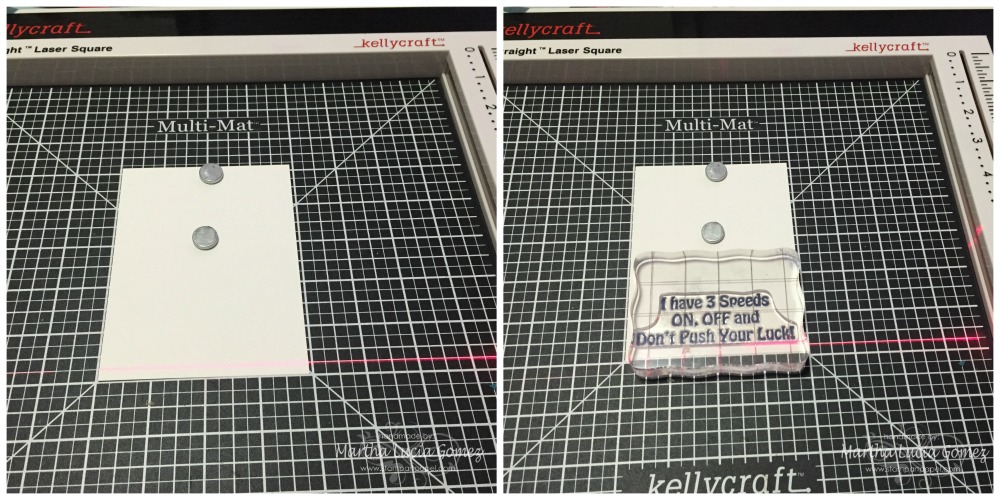
After this, I cut the base of my card using Real Red card stock. The size of the card is a regular size 5-1/2"x4-1/4". I also cut the second and third layers. The second layer is Night of Navy and the size is 5-3/8"x4-1/8" because I created a distress border over this. The third layer is 5-1/8"x3-7/8". 4. I decided to stamp the sentiment first, using my Get-it-Straight™ Laser Square. This helped me to align all my stamps. 
  DON'T PUSH YOUR LUCK

Then, I aligned the three layers and pasted these using snail adhesive and pasted the special details. I embossed a piece of card stock with a Circle Interlock Embossing Folder and pasted this over the white layer. I cut a circle with a framelit and pasted it with snail adhesive too. I finally pasted my principal embellishment: the painted football player.


I always use my Get-it-Straight™ Laser Square to align the layers, the embellishments and all the pieces that I use in my creations.

MATERIALS:
  • Football Player Unique Laser Designs 
  • KellyCraft™  Get-it-Straight™ Laser Square
  • KellyCraft™  Multi-Mat™
  • Jimbo Lojik™ Stamp Set J
  • ESF Chalk It Up Cherry Jubilee
  • Card stock Whisper White, Night of Navy and Real Red (Stampin Up)
  • Big Shot (Sizzix)
  • Circle Interlock Darice Embossing Folder
  • Circle Framelits Collections
  • Distress Tool
  • Nigth of Navy Classic Ink
  • Snail Adhesive
I hope my project inspired you. Remember to visit our store. I am sure you will find great laser cuts that you will love. Come back soon for more ideas!

Martha Lucia

Wednesday, August 13, 2014

Inspirations in Wood - With Ink Pads


Lea here; today is a great day to create!!!  My project for today is something I had been wanting to design, but I didn't have the right elements to create what I wanted till now.  This project is a cover for an "inspirational quote" journal.  I love to save wonderful, spiritual sayings!


First, I'd like to show you how I store my wood cuts!  These bins can be bought at a home improvement store.  My hubby gave me these after his service center closed after 23 years.  This was a great find for me.  I haven't labeled my bins yet, but I have them separated in various ways like "words," "frames," "nature," "the sea," etc.


Here is my finished journal cover.  I will be showing you that ink pads are another media that helps one create fast, easy and with rich color!!!


Starting with the journal background, various ink pads were used "Direct to Rubber," or DTP.  I swiped the pads over the surface for base colors.  Then I used texture stamps to create patterns and depth on the cover.


I stamped a quote on the cover which showcases what my journal is about.  The background colors and patterns are "free play."  As adults we have so many rules, we forget to just play and feel.  This is a very popular technique used by many artists like Diane Reavley!  Stamps, stencils, paint, or ink pads.


A close up of one of the patterns.  Notice I don't saturate the whole stamp, I want it to look natural with dark and light spots to blend seamlessly.


Use ink pads right on the wood to color!!!  I like the smaller sized pads for the wood.  Gives me control of where the color goes.  I wiped some of the color off of the areas I wanted to highlight, and used a darker blue for shadows.

These pads are "Pigment" ink pads.  Pigment pads are juicy, and while they won't dry on non porous surfaces (like acetate), the wood is a great substrate.  If you live in a humid areas heat the colored wood with your stamping heat tool to help dry it faster.


One color blends into the other so you have seamless shading and highlighting!


A tag is hand painted with ink pads as well.  Easy to color wood with ink pads.  TIP:  If you find the color ink is too dark to what you want, just wipe what you can off.  Use a too light color first or even white, heat set, then go on to the color you want.

You can create your own colors by adding lighter color, then adding darker on top, or various shades.  If you do this before you heat set, the colors will mix and blend.


daisies


Here is the wood I use.  I like that many packs have several wood cuts - great for many projects!

I am a technique type artist.  I am a more "impressionistic," funky artist using my intuition and feelings to express in my art.  I like to take what supplies I have to design with.  This makes what you have in your art stash go a long way!  Many uses like the ink pads, they are not just for stamps!!!

Cre8tivelea Yours - Lea