Showing posts with label gelatos. Show all posts

Saturday, March 28, 2015

Pocket Art! Mixed Media Title Card Using Unique Laser Designs' "Birds" Wood Embellishments!

Hi guys! With Easter quickly approaching, I thought I would share how I created this mixed media title card for my pocket scrapbooking album using Unique Laser Designs' "Birds" wood embellishments.

Easter Week #14 Mixed Media 
Pocket Scrapbooking Title Card

Without further ado, let's do this:

Started with a 4x6 Piece of
 Mixed Media Paper & Gelatos


Randomly Colored the Mixed Media 
Paper with the Gelatos

Spritzed the Paper with Water 
and Lightly Blended with my Finger.

Dried with a Heat Tool & Added 
Hazel & Ruby Mask Alphas

Painted the Entire Journal Card 
with Champagne Extreme Glitter Paint

Traced the Alphas with a 
Black Uni-ball Signo Pen

Filled in the Alphas with
 White Golden Acrylic Paint

Added "Rays" to the Background 
with Dandelion Archival Ink

Pulled Unique Laser Designs
 "Birds" Wood Embellishment 
from my Stash

Added Doodle Border, Dates, 
Week #14, & "He is" with Black Ink

Added 1st, 2nd, & 3rd Generation
 "Hand Carved'" Cross Image 
with Black Archival Ink

Shaded the Alphas with a 
Gray Tombow Marker

Distress around the all the Images 
& Edges with "Vintage Photo"
 Distress Ink

And, VOILA'....Get'r DONE! ;D


Please let me know if you have any question! I pray this tutorial was helpful!

Many blessings to you,
www.shelleyrchavis.blogspot.com

Monday, February 16, 2015

A FEATHER PIN

Hi friends, Martha Lucia here with a Feather Pin for you. For today I want to create something different and this time my imagination give me a Pin.


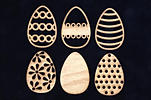
Don´t think that this is a card. My pin is attached to the card but before I explain all the details let me show you how beautiful the designs of all the Feathers are that you can find in Unique Laser Designs Store. They come in a package of 6, 2 of each model and in two different sizes, 2" and 4".


I started my project using the Feathers in MDF version. They are available in MDF, chipboard and cork. My first step was to apply GooseBumps directly over the feather and let it dry for a few minutes to give it a little more texture. On the third photo you will note the difference between a natural feather (left side) and the feather with the GooseBumps.


I started to give it color using four different colors of Gelatos. I began with the soft to dark color and I applied the color with my finger tips. I used the brush paint only to clean the spaces inside the feather.


Now you will see how looks my feather after I all the color was applied and how the GooseBumps gave to it a little texture.


To create the base of my pin I used a canvas fabric that I cut with a Circle Die and decorated with some Sequins, Tulle Ribbon and Thick Backer´s Twine. I attached my feather to this using silicone. And behind it all I put a  little clothespin. 


To finalize my idea, I created a base card to attach my pin and present it to you.


Materials:


See you the next week with another unique idea because with the products of Unique Laser Designs the ordinary becomes extraordinary.


Thursday, November 27, 2014

My Special Bag for Holidays

Hi everyone,

Martha Lucia here! This time of the year is absolutely my favorite; gathering with friends and family, decorating, celebrating the reason for the season and creating a lot of special gifts. Today I want to share My Special Bag for the Holidays.


One of my favorite things about the holidays is the opportunity to give the gifts and pack them. But during the last few years I have discovered more and more that gift cards and money seem to be a crowd favorite. It simplifies things, but sometimes money and gift cards don't feel very personal. So this year I decided to create special bags because the packaging becomes even more important, so as to make the gift feel more meaningful.

I think I chose the perfect product in the Unique Laser Designs Store. This is the Holly Ornament that I will show you today. This is a unique piece available in unfinished wood, great to decorate and personalize. I made mine using Versamark ink and different colors of embossing powders: Cherry Cobbler, Wild Wasabi, Early Espresso and Gold from Stampin Up.  I then created a little texture over the leaves with Gelatos in yellow, brown and dark green from Faber castell.


The bag is a Mini Muslin Bag from Stampin Up that came in a plain ivory color and I decided to decorate with Encore Gold Metalic Ink and a sponge dauber. To avoid mixing the ink in both sides of the bag I put a piece of cardboard covered with wax paper inside of the bag.

The final touch was a cherry cobbler bow with a line of gold sequins to tie a small tag with best wishes stamped. The holly ornament came with a ribbon to hang it easily on the tree. 


Now I want to show you the original form of my holly ornament and invite you to visit the ULD Store to see all of different ornaments that are available during this holiday season. 


Products Used:


  • Holly Ornament - UNIQUE LASER DESIGNS
  • Versamark Ink
  • Embossing Powder in Cherry Cobbler, Wild Wasabi, Gold and Early Espresso (Stampin Up)
  • Encore Gold Metalic Ink (Stampin Up)
  • Sponge Dauber
  • Muslin Bag
  • Sequins
  • Ribbon
  • That´s the ticket Stamp Set or Ese es el Boleto Set de Sellos (Stampin Up)

 Come back soon to see more wonderful ideas!

{{HUGS}} Martha Lucia!

Sunday, September 28, 2014

Mixed Media Canvas


Hello there everyone, Heidi back here sharing a gorgeous little 8x8 canvas I made of my eldest daughter and her partner.  Spring has arrived on our side of the world and I wanted to do something bright and bold.


I started off by painting the canvas with some gesso, and then got some Double Scoop Gelato's.  I just love the bright bold colors.  I randomly colored in squares on the canvas using three of four different colored Gelatos and then using a wet wipe blended the colors together.

Once I was happy with the background, I added some texture paste and the diamond stencil on it and did some random stamping using black ink.

I then cut up some circles and squares from some old papers and added them to the canvas to bring in some other bright colors.

For the gorgeous Triangles I just used Faber Castle Big Pen Marker to color them in,  I have to say I just love the shapes and I have ordered some of these in cork too.

.                        

Here is a little close up of the Triangles - I just love the texture they give the canvas


Finally added my photo and some White Ink spats over the canvas, and my canvas was done.


Product used :-

Triangles in MDF, but also available in Cork and Chipboard
Canvas
Double Scoop Gelatos
Faber Castle Big Black Pen
Texture Paste
Diamond Stencil
Black Ink
Stamp
White Ink

Hope you have found some inspiration on how these gorgeous triangles can be used with mixed media as well.


TFL & Happy Scrapping


Monday, July 14, 2014

A splash of color


Time to make a "splash" with these paint splats from Unique Laser Designs.  I think they are perfect for embellishing my layout about our trip to the National Gallery of Art in Washington DC.


I simply used gelatos (from Faber-Castell) to color on them.  
The color goes on so smoothly.


I think they would also be great for layouts about 
swim lessons,
or puddle jumping, 
or painting my room a new color, 
or art class,
or a day at the beach, 
or dad's giant cannonball splash into the pool, 
or muddy footprints from a rainy day.

SO versatile--I think I may need to order some more splats!

So, what would you use some splats for?


Saturday, April 19, 2014

My Soul has Wings....


This is my mixed media canvas for my  Unique Laser Designs design team...using lyrics from a song that evokes fond memories from my years singing in high school chorus...using a hand-cut "feather" from vintage music paper, along with some canvas feather shapes...AND a beautifully cut feather from Unique Laser Designs!

Lots of layers on an 8 x 10 canvas..Bits & Bobs of trims and papers from my stash in my BEE HIVE studio....Swirly corner cut out from ULD....and paper mache' eggs all colored with my favorite Faber Castell gelatos....nesty is a vintage (YUM!!!!) jello/tart mold. Sweet little birdhouse charm dangles from one edge.
********
Be sure to bookmark our blog here...and keep checking back to see the loverly creations by all of the other team members....AWESOME inspiration!!
and also....There is a contest!!...whooowhooo!
Spread the word!.....come on and join us here!

creative blessings,
debbie


Sunday, April 13, 2014

Egg-cellent Easter Card

Hello Friends!

Katy here and today I am going to show you a CAS card using these awesome Easter Eggs!

I used light modeling paste mixed with 2 shades of green Gelatos-lime and spearmint.  I used that over a leaf stencil from Dylusions/Ranger.  Then I stamped the sentiment (Hampton Art).  Lastly, I adhered my Unique Laser Design Eggs to the card.


For these eggs I painted them with Tim Holtz's Distress Paints spun sugar (pink) and peeled paint (green).  Now you can use a different type of acrylic paint on them.  This is what I happen to have on hand.  Then I used Crystal Stickles to give the eggs some shine.


Thank you for stopping by!  Oh!  And our April Challenge is still going on...have you submitted your project?

Thursday, April 3, 2014

Follow Your Dreams......

Follow your dreams...

...and BE YOUrself!!

Lovelovelove Unique Laser Designs
and all of their wonderful product!..I am OHSOHonored to have been selected to be one of the Design Team members for April-July 2014! - Unique Laser Designs is based in California and specializes in laser-cut craft items, made from MDF....with new products being added regularly...there is always something NEW & fresh!
I took the ULD tags ( a wonderful cut of 3.5" x 6.6") and used mixed media techniques to attach this toooooooo cool Tim Holtz idea-ology cabinet card onto a vintage dictionary page with the word BELIEVE highlighted. The cut-out BElieve in YOUrself is also by ULD.
*******
And another tag:

Colored with Faber Castell Gelatos( OHMYGoodness...the YUMMYNESS!)...and paper pieced sailboat attached with mod podge.....The seagulls are also from ULD!
Soooooooooo many possibilities!!
Be sure to check out their shop!

I have another Design Team posty due on the 8th...where I will be showcasing more ULDproduct..it plays well with all the others!!

creative blessings,
debbie

Wednesday, April 2, 2014

Wishing for spring wreath


My wish...SPRING!
Oh spring, spring...where for art thou spring?

I created something springy and crafty last week, but it really didn't seem to have any effect on Mother Nature, so I'm trying again. This time, I'm making a wreath to grace the door and scare away the winter spirits.  And I'm using ADORABLE spring shapes from Unique Laser Designs!

First, I took a straw wreath and wrapped and wrapped it with this pastel variegated yarn.
Next, I took some canvas flower shapes from Linnie Blooms,  I colored them with gelatos (pink and orange), and spritzed with water so I could spread the color with my fingers.  On some of the flowers I added LOTS of color, some just a bit.  Some are more orange, some are more pink. A flowery hodge-podge!
Next, it's painting time!  I painted these ADORABLE Easter shapes and letters from Unique Laser Designs.


I "marble-ized" the solid egg and bunny by blending gelatos over the dried acrylic paint and then splattered the letters with pink paint after covering them with a few thin coats of Distress Stain Picket Fence.


This is my ode to spring.  Mother Nature are you listening this time?


I couldn't stop playing with these adorable shapes, so I'm tucking in a few more ideas if you get a few minutes to play.


Pin It