Showing posts with label Snowglobe. Show all posts

Monday, November 17, 2014

Winter Getting You Down? Shake It Off!

Brrrrr!  Hello everyone, it's Renee from Scrap Owl back with today's creation inspiration!

The snow is starting to stick on the ground and I'm none too happy about it. See, even living in northern Illinois I can admit that winter is not something I look forward to.  Yes, we have snowmobiling, and sled mountains, and ice skating, but we also have cold.  Bone chilling cold. Why can't we have all the fun and none of the cold?  Well, my project today, I did just that!


Snow Globe Shaker Card

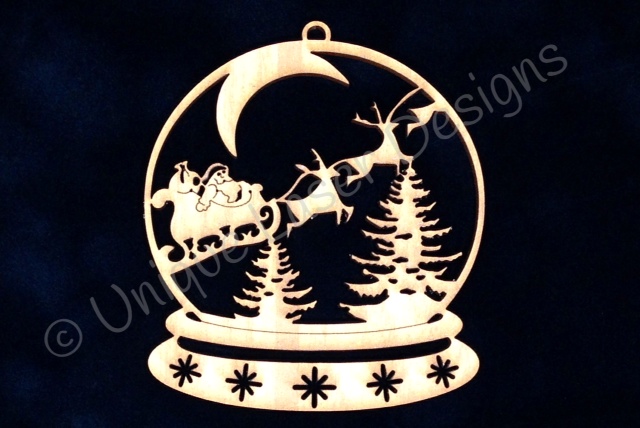
I created my snow globe shaker card using the the Snow Globe - Bell die cut.  This particular die cut was made from chipboard, but it is also available in the medium density fiberboard (MDF).  I used a tip that I gleaned from Kisha Walton during our Scrap Owl Podcast interview where she told me that you can stretch your Unique Laser Design pieces by cutting them up.  It got me thinking.... "do you wan to build a snow globe?"


By cutting out the bell inside the globe, I now have two pieces that I can use for my cards or layouts.  Additionally, it opened up space to make a shaker card!  If you haven't seen these yet, they are extremely popular right now.  I actually had the chance to talk with Paulina Nakamura from Pretty Pink Posh who, some say, is the mother of the shaker card movement.

I primed the snow globe with some white paint for the globe part and some black paint for the base.  I then went back and added a coat of Imagine Crafts Clear Creative Medium for shine.  On the bottom, I only applied the medium, but on the top I mixed in some subtle sparkle.


To make this shaker card, I stamped a sentiment on top of a piece of vellum and attached that to the underside of the chipboard snow globe.  Then I applied foam tape to the back of the chipboard to make the snow globe pop off the page a bit.  This step is crucial for a shaker card.  You need to give the sequins enough space to wiggle and jiggle.

For this card I used Paulina's Marshmallow sequins.  They have just the right amount of shine to mimic snow.  I flattened them into a small group and then attached the snow globe right on top of them.


For the base of the card, I used the a-side of Merry Christmas from Moxxie's Happy Pawlidays collection. I also stamped some small snowflakes around the snow globe and embossed them with a pearl shine.

I simply love the way this card came out and hope you do, too!  Also, I'm looking forward to sharing with you what I do with the bell that originally came with the snow globe!!  Stay tuned!!

Stay Scrappy My Friends,
Renee

Wednesday, November 5, 2014

A very sparkly season


Once Halloween passes, I head right into the sparkle. I don't forget about Thanksgiving, but while my mind is focused on being grateful, my hands are busy creating for the Christmas season.  And for me, this season gives me the go-ahead to sparkle sparkle sparkle.


My first sparkly project of the season uses this wooden snow globe from Unique Laser Designs as the main focus of an over-sized tag. I spread a thin layer of Tacky Glue over the whole ornament (the end of a paper clip works great for moving the glue out of the intricate designs) and then sprinkled on a heavy load of ultra-fine platinum silver glitter. I added a red ribbon to the top too.

For the base of this tag (which is 4"x5"), I covered it in white cardstock and then punched out all different sizes and shapes of snowflakes from the same white cardstock and glued them on closely and randomly.  I even let some hang over the edge and then trimmed them later when I had the whole tag covered.  

I framed the edge with some black and white polka dot washi tape and added some die-cut trees that I "snow-swiped" with Picket Fence Distress Stain.  

I glued the snow globe to the tag along with some song lyrics and now this tag is a perfect addition to a simple hostess gift (maybe on a bottle of wine?).


Wishing you lots of crafty time as we begin these seasons of being grateful and being sparkly!

Friday, October 10, 2014

Christmas Card with Removable Ornament

Hello Friends!

I am so honored to have been invited to be a Guest Designer for Unique Laser Designs and my first project is a Christmas card featuring a removable Christmas Ornament if the recipient desires to use it on their Christmas tree!


So, first, I’m sharing a step-by-step tutorial of how I put this together starting with the ULD embellishments:


I used the title in chipboard and the ornament is the good-smelling wood!

First, I painted the title chippie with white acrylic paint, sprinkled on some Stampendous Shabby White embossing powder while still wet and then heat embossed it. I then rubbed a little Tim Holtz Fired Brick distress ink around the edges to make it stand out a little and match the color scheme of my papers I used for the card.


For the wood embellishment I painted on a coat of Gesso, then dabbed a paint brush in some water, wiped it off a bit, then dipped it in my Perfect Pearls Forever Green for the leaves, Forever Red for the berries, Perfect Gold for the vase and Perfect Bronze for the candle. After it dried I used Glossy Accents over the ivy and vase to give it a little gloss.
I then got out my homemade texture paste (from a Gabrielle Pollacco tutorial), grabbed a plastic knife and dabbed it at the top of the candle to look like dripping wax.
The next step I used Tombo Mono Liquid Glue on the flame and sprinkled Doodlebug Design, Inc.’s Sugar Coating glitter in yellow and black for the base of the snow globe. For the outer rim I used Diamond Chunky Glitter Glass from Reneabouquets.com. I also dabbed a little white paint on the candle, ivy and vase to look like snow.

Now, to make the card…
I used K & Company’s Elizabeth Brownd Visions of Christmas Designer Paper. I cut out the blue snowflake background first, wanting it to appear as looking out a window.
I used G45 Botanical Tea paper to make my window frame.


For the valance, back to the K & Company paper and a Martha Stewart Doily Lace punch.


I then misted it with water to make it easier to pleat by hand. When dry I added some small self-adhesive foam squares to apply to the top of the card and a little trim I had in my stash on top of that.


I then decided to use a little more texture paste to make the window frame appear to have snow settling on it!


I also used some Ranger Star Dust Stickles here and there on the background paper to make it appear to be snowing! I then added a little cocoa mug sticker from Walmart.
And there you have it!
Have a great day friends!
Elizabeth
ULD Products used:

Other products:
K & Company EB Visions of Christmas 12x12 card stock paper pad
G45 Botanical Tea 12x12 card stock paper pad (for the window frame)
Perfect Pearls – Forever Green, Forever Red, Perfect Gold and Perfect Bronze
Glossy Accents
Doodlebug Design, Inc. Sugar Coating glitter
Diamond Chunky Glitter Glass from Reneabouquets.com
Tim Holtz Distress Ink – Fired Brick (around Merry Christmas) and Vintage Photo (around windowsill)
Martha Stewart Doily Lace punch