Tuesday, April 21, 2015

FOOTBALL PLAYER CARD

Hi everyone, Martha Lucia here with a "Football Player Card" to share with you. It's not common for me make masculine  cards but, I received this wonderful laser cut and I decided to use it immediately.

DON'T PUSH YOUR LUCK


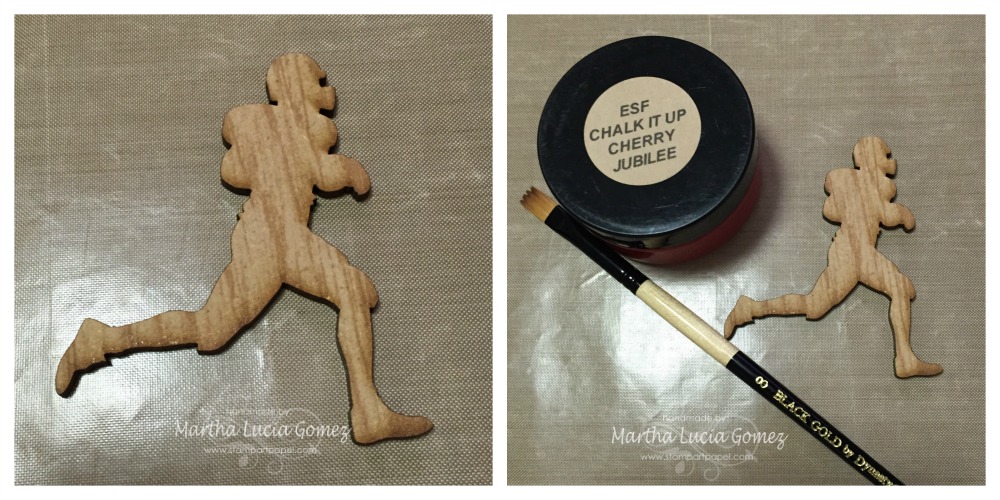
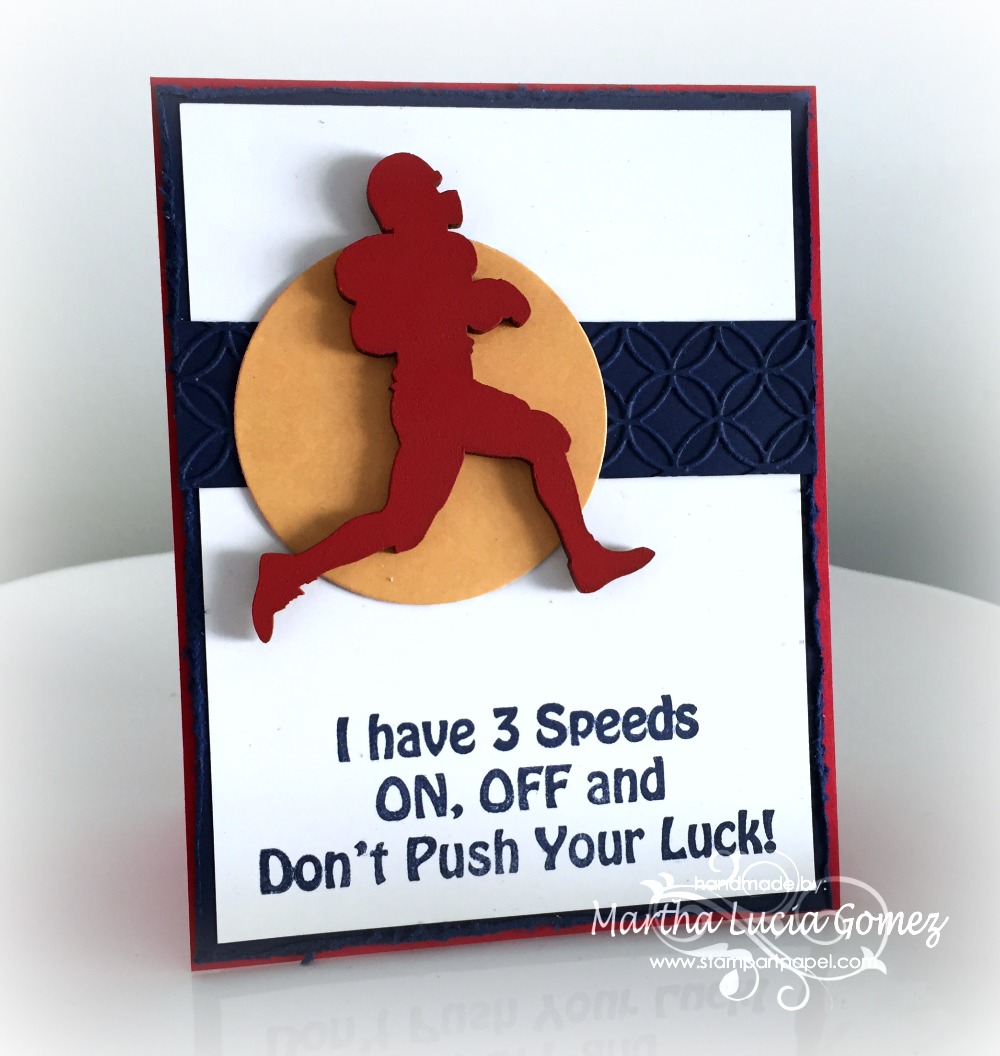
To create this project I am using a Football Player Laser Cut available in our store. It comes in natural wood, chipboard and cork.  I used the wood version and I decided to give it color using ESF Chalk It Up Cherry Jubilee.

DON'T PUSH YOUR LUCK  

I applied the ESF Chalk It Up with a Black Gold by Dynasty paint brush and let it dry for a few minutes.
DON'T PUSH YOUR LUCK

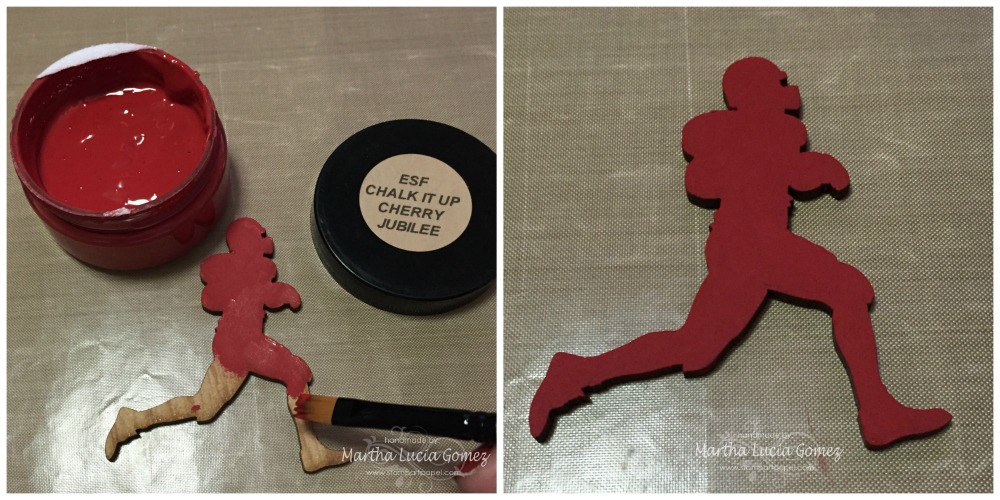
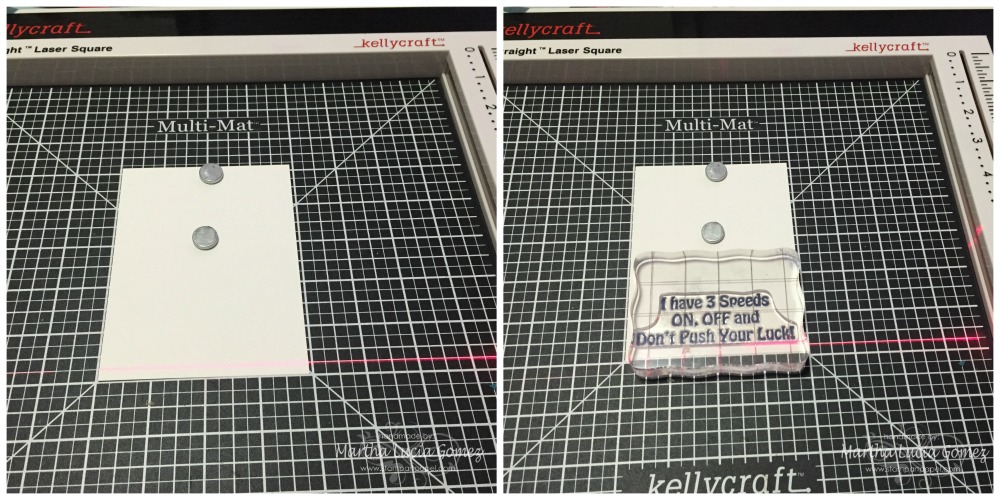
After this, I cut the base of my card using Real Red card stock. The size of the card is a regular size 5-1/2"x4-1/4". I also cut the second and third layers. The second layer is Night of Navy and the size is 5-3/8"x4-1/8" because I created a distress border over this. The third layer is 5-1/8"x3-7/8". 4. I decided to stamp the sentiment first, using my Get-it-Straight™ Laser Square. This helped me to align all my stamps. 
  DON'T PUSH YOUR LUCK

Then, I aligned the three layers and pasted these using snail adhesive and pasted the special details. I embossed a piece of card stock with a Circle Interlock Embossing Folder and pasted this over the white layer. I cut a circle with a framelit and pasted it with snail adhesive too. I finally pasted my principal embellishment: the painted football player.


I always use my Get-it-Straight™ Laser Square to align the layers, the embellishments and all the pieces that I use in my creations.

MATERIALS:
  • Football Player Unique Laser Designs 
  • KellyCraft™  Get-it-Straight™ Laser Square
  • KellyCraft™  Multi-Mat™
  • Jimbo Lojik™ Stamp Set J
  • ESF Chalk It Up Cherry Jubilee
  • Card stock Whisper White, Night of Navy and Real Red (Stampin Up)
  • Big Shot (Sizzix)
  • Circle Interlock Darice Embossing Folder
  • Circle Framelits Collections
  • Distress Tool
  • Nigth of Navy Classic Ink
  • Snail Adhesive
I hope my project inspired you. Remember to visit our store. I am sure you will find great laser cuts that you will love. Come back soon for more ideas!

Martha Lucia

Thursday, April 2, 2015

Decorative Easter Straws and Holder

I wanted to create something fun for my kids during Easter as a decoration for the table and also functional as a straw (but it could also be used purely as a centerpiece decoration for a table or the straws on their own as cupcake toppers).  The best part is the slide on the straw is removable once the straw has been used and slid onto another straw to be used again next year!!


Here is a step by step tutorial for how made the fun little holder and cute Easter straws using the wonderful Unique Laser Designs wood shapes, Canvas Home Basics papers and rope, Tattered Angels mists and paints, Die-Namites Dies, and Xyron Adhesive.


Here are some up close pictures of the straws and holders, look how the wood shapes just shine with the mists on them.


The wonderful Unique Laser Designs Easter wood pieces in Bunnies 6 pc Set, Easter Eggs 6 pc Set,
Rabbits 2 pc Set  were just perfect for this project.
http://www.uniquelaserdesigns.com/#!easter/c1z18


I hope you have a wonderful Easter, and enjoy these fun little ideas for your kids or party this Easter.

Supplies Used
Unique Laser Designs :
Cardstock - Canvas Home Basics
Rope  - Canvas Home Basics
Mists - Tattered Angels
Die Cut - Die-Namites Dies
Die Cut Machine - Cuttlebug
Punches - EK
Ink - Prima
Adhesive - Xyron
Straws - Recollections
Jar
Enjoy!!

Tuesday, March 31, 2015

Easter Greeting

Easter would not be complete if I didn't create a seasonal card for my mom. I really love creating greeting cards for this particular holiday, it's such an unexpected surprise for the receiver.
 
Today I will share with you my steps in completing this mildly shabby Easter greeting card.


For my card I used Unique Laser Designs Bunnies


I begin with adding layers of pattern paper, inks and light molding paste to my base.


Next, let's add a little color to the Bunnies. I originally used Heidi Swapp's color shine mist in white but the color isn't saturated enough.  I decided to use white acrylic paint and mix a little water in to dilute.
 
 
After covering the Bunnies with the paint mixture, use a baby wipe to remove some of the color.  This will leave you with a more soft and shabby look.


Now layer on more embellishments


Art Ingredients:

Unique Laser Designs -  Bunnies
Papertrey Ink Cardstock
Pattern Paper
Light Molding Paste
Gesso
Crochet Doily
Raffia
Seam Binding
Color Mist
Florals
Buttons
Michaels Sentiment Stamp
Stazon Ink
Acrylic Paint

Saturday, March 28, 2015

Pocket Art! Mixed Media Title Card Using Unique Laser Designs' "Birds" Wood Embellishments!

Hi guys! With Easter quickly approaching, I thought I would share how I created this mixed media title card for my pocket scrapbooking album using Unique Laser Designs' "Birds" wood embellishments.

Easter Week #14 Mixed Media 
Pocket Scrapbooking Title Card

Without further ado, let's do this:

Started with a 4x6 Piece of
 Mixed Media Paper & Gelatos


Randomly Colored the Mixed Media 
Paper with the Gelatos

Spritzed the Paper with Water 
and Lightly Blended with my Finger.

Dried with a Heat Tool & Added 
Hazel & Ruby Mask Alphas

Painted the Entire Journal Card 
with Champagne Extreme Glitter Paint

Traced the Alphas with a 
Black Uni-ball Signo Pen

Filled in the Alphas with
 White Golden Acrylic Paint

Added "Rays" to the Background 
with Dandelion Archival Ink

Pulled Unique Laser Designs
 "Birds" Wood Embellishment 
from my Stash

Added Doodle Border, Dates, 
Week #14, & "He is" with Black Ink

Added 1st, 2nd, & 3rd Generation
 "Hand Carved'" Cross Image 
with Black Archival Ink

Shaded the Alphas with a 
Gray Tombow Marker

Distress around the all the Images 
& Edges with "Vintage Photo"
 Distress Ink

And, VOILA'....Get'r DONE! ;D


Please let me know if you have any question! I pray this tutorial was helpful!

Many blessings to you,
www.shelleyrchavis.blogspot.com

Thursday, March 26, 2015

DAISIES FOR MY FRAME

Hi friends, here Martha Lucia with my most recently creation using Daisies from Unique Laser Designs Store. We are officially in Spring and as you can note I love frames, so now it is time to create one for this season.


In this opportunity I am using a silver frame from IKEA, they are very cheap and you can change your layout very frequently. This silver color is sophisticated and looks perfect with these laser cut: The Daisies!!!


I gave color to the Daisies using watercolor paint. I mixed white, yellow and dark orange.


I started with the a solid color and then changed my mind to mix all the colors. I used an acrylic block to mix the paints and water.


Here you can see the color transformation or combination. You choose.


I let my daisies dry completely and in a while i cut a basic gray cardstock to put inside of my frame. I cut and layer my photo to paste over this layer. For me it is easier to decorate my frames when the layers are placed within the framework.


I aligned all the elements and pasted the daisies flowers using a liquid glue. After this I pasted a black stone on the center of each flower and on top of the central banner. As a final touch I gave it a little bling using my brush of Wing of Stella Clear over some petals and stamped a sentiment to put vertical over the right side.


Materials:


I hope you like this frame, visit us in Unique Laser Design Store and choose your embellishments to create your own frame using different techniques and products. Here in our blog you always will find great inspiration.

See you soon with other idea to make together!

Martha Lucia

Wednesday, March 25, 2015

Lovely Easter Shaker Card

Have you seen these fun shaker cards? They are everywhere and so easy to make, especially when you have beautiful laser cuts from Unique Laser Designs

For today's Easter shaker card, I used four different ULD wooden laser cuts:
1. Bunnies (6 pc. set)
2. Easter Eggs (6 pc. set)
3. Butterflies (Sm)
4. Daisy-Chubby (5 pc. set)

Decorate the wooden laser cuts any way you'd like. You could leave them bare, paint them with acrylic paints, or paint and cover them with pretty Easter glitter.

To make the card base, begin with a pink piece of card stock, cut 5 inches square. Then take a piece of black card stock, 4.75 inches square, and the flower patterned piece, cut 4.5 inches square. Adhere the black card stock on to the pink card stock.


To make the insert wreath, take a second shade of pink card stock, and die cut the Grendon Wreath, from Poppystamps. Carefully punch out and set aside. Then center the metal die cut onto your patterned piece, tape down with a little piece of removable tape, and cut out the wreath. Carefully remove the die cut from the pattern.


Carefully insert the pink wreath into the patterned card stock. Use a little removable tape on the back to keep it snuggly in place.


Turn the pattern piece over and adhere a piece of plastic acetate over the back of the wreath. Use as little glue as possible to keep it securely in place. Cut out a square piece of craft foam and adhere it onto the back of the patterned piece of card stock. Apply glue and let it sit for a moment. This photo shows the back side of the patterned piece, the blue removable tape holding the wreath snuggly in place, the acetate piece glued on top, and the black craft foam piece glued into place, with more glue on the top.


On top of the black card stock, add a colorful piece of pattern paper and glue securely in place. Make sure it will not show through the flowery pattern piece that will fit on top. Add your shaker filler to the center of the card. You can use colorful sequins, micro beads, confetti, whatever you choose. When the sequins are in place, carefully adhere the pattern piece 'window" you have created and press in place. Set aside and let dry. Do not be tempted to shake your card until it is completely dry! When it dries, add your beautiful Unique Laser Designs wooden laser cuts. I used a bunny, an Easter egg, a tiny butterfly, and a chubby daisy to make this colorful Easter shaker card!


Thanks for joining us today!

Live your life in color!


Materials List
Unique Laser Designs Bunnies (6 pc. set) W-1008
Unique Laser Designs Easter Eggs (6 pc. set) W-1054
Unique Laser Designs Butterflies (Sm) W-2024
Unique Laser Designs Daisy-Chubby (5 pc. set) W-1157
Pink card stock - 2 shades
Black card stock
Patterned card stock (2 complimentary patterns)
Grendon Wreath die cut, available from Poppystamps
Clear Acetate transparent plastic sheets (available at craft or computer stores)
Shaker filler: sequins, micro beads
acrylic paint (white, blue, yellow & pink)
glitter (white, blue, yellow & pink)
craft glue