Tuesday, July 29, 2014

Forest Fairy Wonderland


Lea, here; a new design team member!  Today I want to share a layout using :

                                                            Young Fairy:  Pixie
                                                            Leaves:  Small


Soft painting and collage gives this scene a magical look.  Bo Bunny paper was used, cutting parts to collage for further expression and feeling of the theme.

The paper was enhanced with painting - watercolor to the tree, and acrylic pattern in the background.


 First, I placed pieces for layout and collage to get a sense of how I want my art to look.  I decided not to use the top paper strip.  I had painted the tree and accented the background with liquid acrylic paint.


I just ADORE ULD WOOD!  I know many people comment on the smell, which I love too.  The wood is premium, no sanding needed, and the texture/coloring is beautiful.

Dry brushing a small amount of Gesso (base coat used to save money on expensive paints) on areas. I am using liquid acrylic paints.  I do not want much of the texture and want the colors to be true so the Gesso helps.  I left the skin natural to keep the texture.


A light touch painting the little fairy, almost transparent but not quite.  Simple shading and a tiny bit of dry brushing with white.  I usually do not use black for shading and in some art, I do use a little white as an extra pop of highlighting.


On the close up of the face, you can see the simple shading and the white added for highlights.  Glitter added on wings.


Here the leaf is painted in a darker green and yellow is used as a highlight.  Layering shades is simple yet effective.


Word "Inspire" is cut on an electronic cutting machine.

I am really excited to be a part of this talented team!!!

Cre8tiveLea Yours -


Friday, July 25, 2014

Complete a project with just one ULD!

Are you ever working on a project and say I only need one more embellishment to finish this off?  Why not finish it off with just one Unique Laser Designs wood embellishment?

Here are a few tags I made where I only used one ULD.  Remember you can paint, distress, stamp, emboss, cover w/ paper, etc.. so many options for finishing off your wood embellishments. 

Stop by the Unique laser Designs website to see a variety of shapes you might want.

mini dragon-fly painted

mini "Dream" left blank

Love the feathers, covered in rock candy, distress ink,
paints, and glitter!

mini heart colored blue

Painted mini red heart.

Chunky glitter gold over a pink heart.

Mini "Inspire" left blank.


Thank for looking at my tags.. Hopefully next time you need one more embellishment, you reach for your wood
embellishments. 


Wednesday, July 23, 2014

The Fun Stuff

Hello there from a very freezing cold New Zealand.  Today I am going to share a layout I have done using these gorgeous deco frames...


I decided to emboss the frame with some silver embossing powder, and just loved the lovely shine it gave the frame, and from there I chose my colour combo for the layout.  I decided on green, teal and black.  The actual layout is very simple and just has washi tape underneath the frame, but I wanted to keep it fairly plain because I wanted the frame to be main focus of the photo and page.


here is a little close up of the frame.


To balance the silver embossed frame I embossed the little wooden heart as well and then put some rubons on the heart.


To finish the layout off, I added some flowers and more rubons on top of the washi tape and there you go a lovely layout completed.


TFL & Happy Scrapping


Tuesday, July 22, 2014

Kisha shares her Unique Laser Designs DT Package

A trip back in time

Let me take you on a little field trip back in time.  Isn't it just natural to want to use these wood pieces in a layout about George Washington's home of  Mount Vernon?


 the curly tree, the large Polaroid frame, and the picket fence 


I used Tim Holtz Distress Stains (walnut for the tree, wild honey for the fence, and picket fence for the Polaroid frame) to color these wood shapes from Unique Laser Designs.  This method of coloring maintains the natural beauty of the wood without covering it up.  I added some red bling to complete my cherry tree, but then I really didn't feel like I needed to add anything else.  This was such a simple time in history, I didn't want to add too much.

This layout design is very loosely based on one I saw in the most recent Close to My Heart catalog.  I added my own style with the wood embellishments and surprise---my version has a lot more photos! My versions ALWAYS have a lot more photos.  

One of my favorite things about using Unique Laser Designs products on scrapbook pages is their thin-ness.  I really don't like bulky scrapbook pages, and even layered on top of each other as in this layout, I'm still easily able to slide the page into a clear protective sleeve.

So, I took my ULD shapes way back in time...where are you going to take yours?


Monday, July 21, 2014

A Tale of Two Baskets

Hello Everybody!

Katy here and today I am here to share with you "A Tale of Two Baskets."

I found the first one at a thrift store a few months ago.  Then this past weekend at the same thrift store I found one very similar to the first-so I had to buy it!  I knew I could transform these little baskets into something fun using my Unique Laser Designs embellishments.


The first thing I did to these baskets (after giving them a quick swipe with a wet paper towel to remove dust) was to paint them with gesso.  I could have spray painted them maybe-but I am generally not a spray paint person.  So I used what materials I have on hand.  


So far so good.  When the first coat dried, I added more gesso where I missed before.  I gessoed the handles and the insides of both baskets.

While these gessoed baskets are drying, I looked through to see what fun ULD pieces I was going to use.  These baskets are for a friend of ours two daughters.  They are coming into town and I thought it would be a nice gift to put a nice lotion in each basket.  

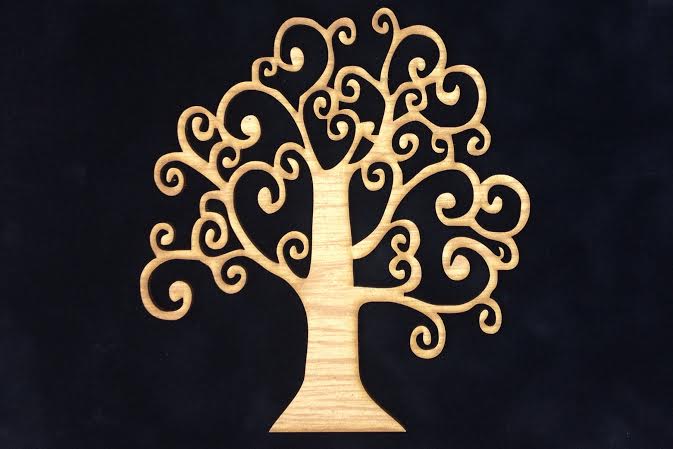
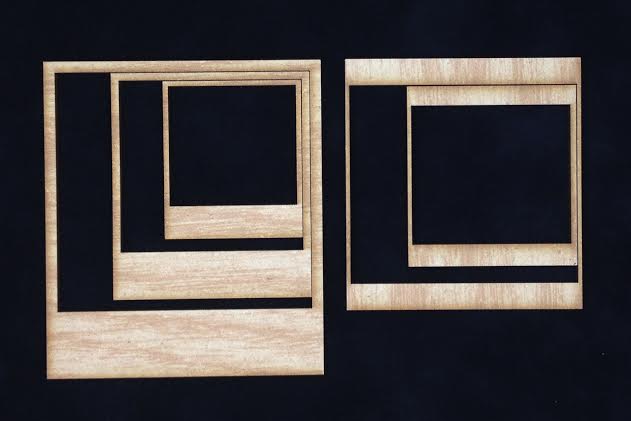
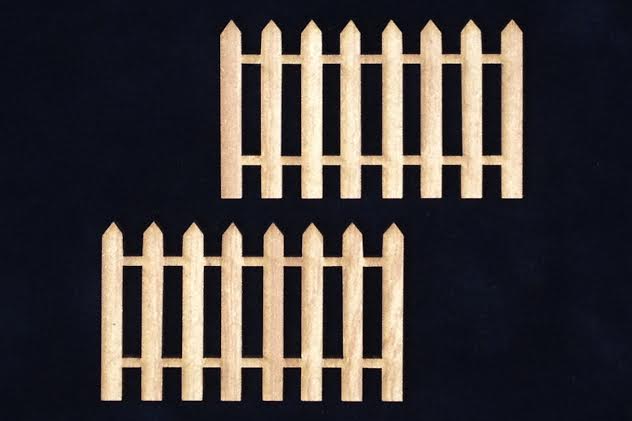
So here are the pieces for one basket.


And here are the gears for the second basket.  One of the young ladies is into robotics at school.  So I thought girly cogs would be fun.  :)


Here are the quick links to the pieces here:  
Daisies (I used a med one)
Tweety Birds (3 pc set) (I used the smallest tweety bird)
(I omitted the gear from the bottom left in the final design.)

Now it's time to decorate the baskets.  For the first one I used Dylusions Spray After Midnight.  I used my fingers to help spread the ink over the handle.  As inky as my hand looks here-it washes off really easily. 


Once the basket dried, I sprayed Perfect Pearls Mist-silver-to give it a shimmer look.  I did encounter one problem here.  After I thought this basket was dry-I picked it up to have purple on my hands. I sprayed Deco Arts Triple Brilliant Gloss Glaze in hopes of sealing the basket.  I had glued Tim Holtz's tinsel to the basket (using Zip Dry) so I sprayed that as well.


Here is the 2nd basket.  I used Tim Holtz Distress paints-peeled paint, spun sugar, and broken china.  The only thing is that it stared to look a bit like an Easter basket.

Here is the 2nd basket.  I used Tim Holtz Distress paints-peeled paint, spun sugar, and broken china.  The only thing is that it started to look a bit like an Easter basket!  But not to worry!  I used some Walnut Stain and Faded Blue Jeans Distress Inks to grunge the basket out a little bit. ;)


So here are the 2 baskets all finished!


I left the daisy in its natural state to go with distress background.


Here is the back of the basket.  It's not quite so springtime now. ;)


Here is the little tweety bird in the cage.  The cage have been heat embossed with silver embossing powder.  The birdy is painted with Distress Mustard Seed and his beaked is orange from a copic marker.  And then I had to add a goggly eye of course!

I tied it to the top with a piece of thin yarn.


Here are the gears with embossing powder.  I hope they are girly enough!  I used a silver trim that was on my desk (and really what isn't on my desk?) to go through the white gear.  It is just covered in gesso.  This is so the other gears would adhere to it.  (Believe me when I say it is very difficult to glue things onto embossed items.)  I used Zip Dry to glue the 3 embossed gears onto the main gessoed gear.


Here is a side view so you can see the ribbon.


Here is the ribbon tied in a nice bow in the back.  


Here is each basket by itself.


Thank you for stopping by today!  I hope that you are inspired to look at baskets differently!  Maybe you have some at home already that could use a little makeover.  Unique Laser Designs are perfect for your basket makeovers!

For more fun ideas check us out on Pinterest!


Sunday, July 20, 2014

Have a Great Vacation!

Hi there crafty friends!
Rachelle here today sharing a card creation for your 
friends or family on vacation.
Just to let them know you are thinking about then.

Here are the Unique Laser Design Products used:

Aren't they awesome? Love them!

Here is the project:

 "Have A Flippin Great Vacation"
  
 I began by painting my wood cut outs and applied a little gloss.
Next, I lined up my layers of cardstock followed by the flat canvas. I love layers!
Then I mixed acrylic paints for the beach and water colors.

More Views:


 I painted and added a brush of white paint for the waves. Then I
added white glitter and let dry.
Next it was time for the sandles, fence, sun, clouds, gulls and sign.
I created the sign from wood pieces and applied the title and wood veneer sunglasses.

Here you can see the blending to achieve the wave effect and how the beach
blends into the water.
 Love using techniques.  It is awesome!

There you have it!
A cute vacation card ready to send!


I hope you have been inspired by this project.
Be sure to stop by
for these and much more beautiful wood laser products.
 New products are being added daily to their large inventory for your crafty needs.

Thanks for stopping by!
See Ya Soon!
Huggies!