Showing posts with label butterflies. Show all posts

Friday, March 13, 2015

ULD: Steampunk Mini Canvas


Hello everyone, Ivy here with a steampunk 3x3 mini canvas to share with everyone.   
I LOVE Steampunk!


Instead of using the front of the canvas, I used the back.


I began by covering the canvas with metallic duck tape.


These are the ULD embellishments I decided to use.  They are  Dragonflies (sm), Butterflies (sm & lg) and the Ladybugs (set of 3).   All were first covered with gesso and then painted and/or covered with the metallic tape.  

After covering the embellishments with the metallic tape, some partially covered as in the dragonfly, only his body had the metallic tape.  Using my embossing tools, I went around each wooden embellishment. 


  Here are some of the tools I used to emboss the metallic tape. 
The mini pot was also taped.  


I used a thin dowel to twirl wire around it.  After I pull out the coiled wire, I stretch it out and I adhered it into place inside of the mini pot, using a glue gun.


With some embellishments, I used a blue Copic pen (BG05).   I placed blue rhinestones on the small Butterfly's body and a small arrow on the larger Butterfly below.


Here's a close up on the embossing that was done to the butterfly.


I placed the Ladybug inside the frame, at an angle with a mini key on its back.


You can see the markings on the Butterfly and Ladybugs that were created with the embossing tools.
I used gray metallic pearls as the spots on the Ladybug's back using glossy accent.


Here's a final look at my completed project 
Visit 
for your custom laser engraved wood, chipboard and cork embellishments.    
For more inspiration visit our blog.
Thank you and I hope you were inspired!
Ivy

Supplies Used

ULD:  Butterflies, Dragonflies & Ladybug
3x3 mini canvas, metallic tape, Beads Landing charms, mini keys, mini arrows, blue rhinestones, colored wire, beaded chain piece, copic pen BG05, mini pot, glossy accent, glue gun, glue sticks

Thursday, January 15, 2015

Beautiful Tag

I love having tags on hand to add to presents instead of cards, and with all the little girl birthday parties I will end up going to I know this little beauty will come in handy to add to cute little gift we will give to the birthday girl.


I used the wonderful wood butterflies from Unique Laser Designs at the top of the tag.  They are just to cute and sweet and perfect for this little tag!  I love a plain look as seen below, but for this tag I wanted them to sparkle, but not too much.
http://www.uniquelaserdesigns.com/#!minis/c1qag


So I first pressed the wood into the embossing medium (like Versamark) to amek it "sticky" for the mica powders to stick.  I used a pale pink color to match the colors in the tag and just used a small dry paint brush to apply the powder to the sticky wood.


The shine and shimmer is just beautiful when it is done, it just catches the light perfectly, and it will not rub off!!  There is no drying time so to make these little shiny gems is super easy and fast too!!


Tags can be used instead of cards, so have fun making some tags for a change of pace!!

Supplies Used
Wood - Unique Laser Designs
Paper - Paper House
Stickers - Paper House
Mica Powder - Imagination Crafts
Cardstock - Kaisercraft
Ink - Prima & Tsukineko
Twine - American Crafts
Adhesive - Tombow
Trimmer - Fiskars
Enjoy!


Thursday, November 20, 2014

O Christmas Tree!

Hello Everybody!

Today is my last post for Unique Laser Designs.  I have had such a wonderful time creating with their wonderful wood embellishments.  I have made projects that would never have been made without these great versatile pieces.  Also, I have learned and been inspired by the ULD Design Team.  They are fantastic and I will continue to keep up with their projects.

So what to make for my last project?  That was tough but I am in the Christmas mood (not worries I haven't forgotten about Thanksgiving.) ;)

So I have these little trees from Tim Holtz.


After a little water and distress ink (mowed grass) the tree is now green.


While it dried, I picked out my "ornaments!"  

                                               Stars (Small and Large)
                                               Butterflies (Small and Large) 
                                               (the heart lg I didn't use)


These little pieces are the insides to other things that I found floating my one of my ULD containers.  I painted them a metallic blue.


Without further ado, here is my Christmas tree!  I used a gold fiber as the garland around the tree.  The instruments are painted gold with Inka Gold.  Both stars were painted yellow but the large one had yellow Stickles put over the paint.  The butterfly I left as but glued it on its side.  The gingerbread man and reindeer have details added to them by a felt tip pen.  I glued one blue ornament on.


Since this is a display tree I didn't go all the way around with ornaments.  I did hot glue the ornaments on.  

This tree measures 6 inches and that's with the star. 


Here's a closeup of the gingerbreadman, star, and instrument. 


Here at the other instruments and Rudolf.


Thank you so much for stopping by!  For more inspiration you can check us out on Facebook and Pinterest! :)


Friday, November 14, 2014

Monogrammed Basket

Hello Everybody!

Katy here and today I am sharing a project I made for a friend of mine using awesome wood embellishments from the Unique Laser Designs Store.

These are wood embellishments that I used:


And then I got to the point where my basket needed one more thing: Lock and Key-Fancy.


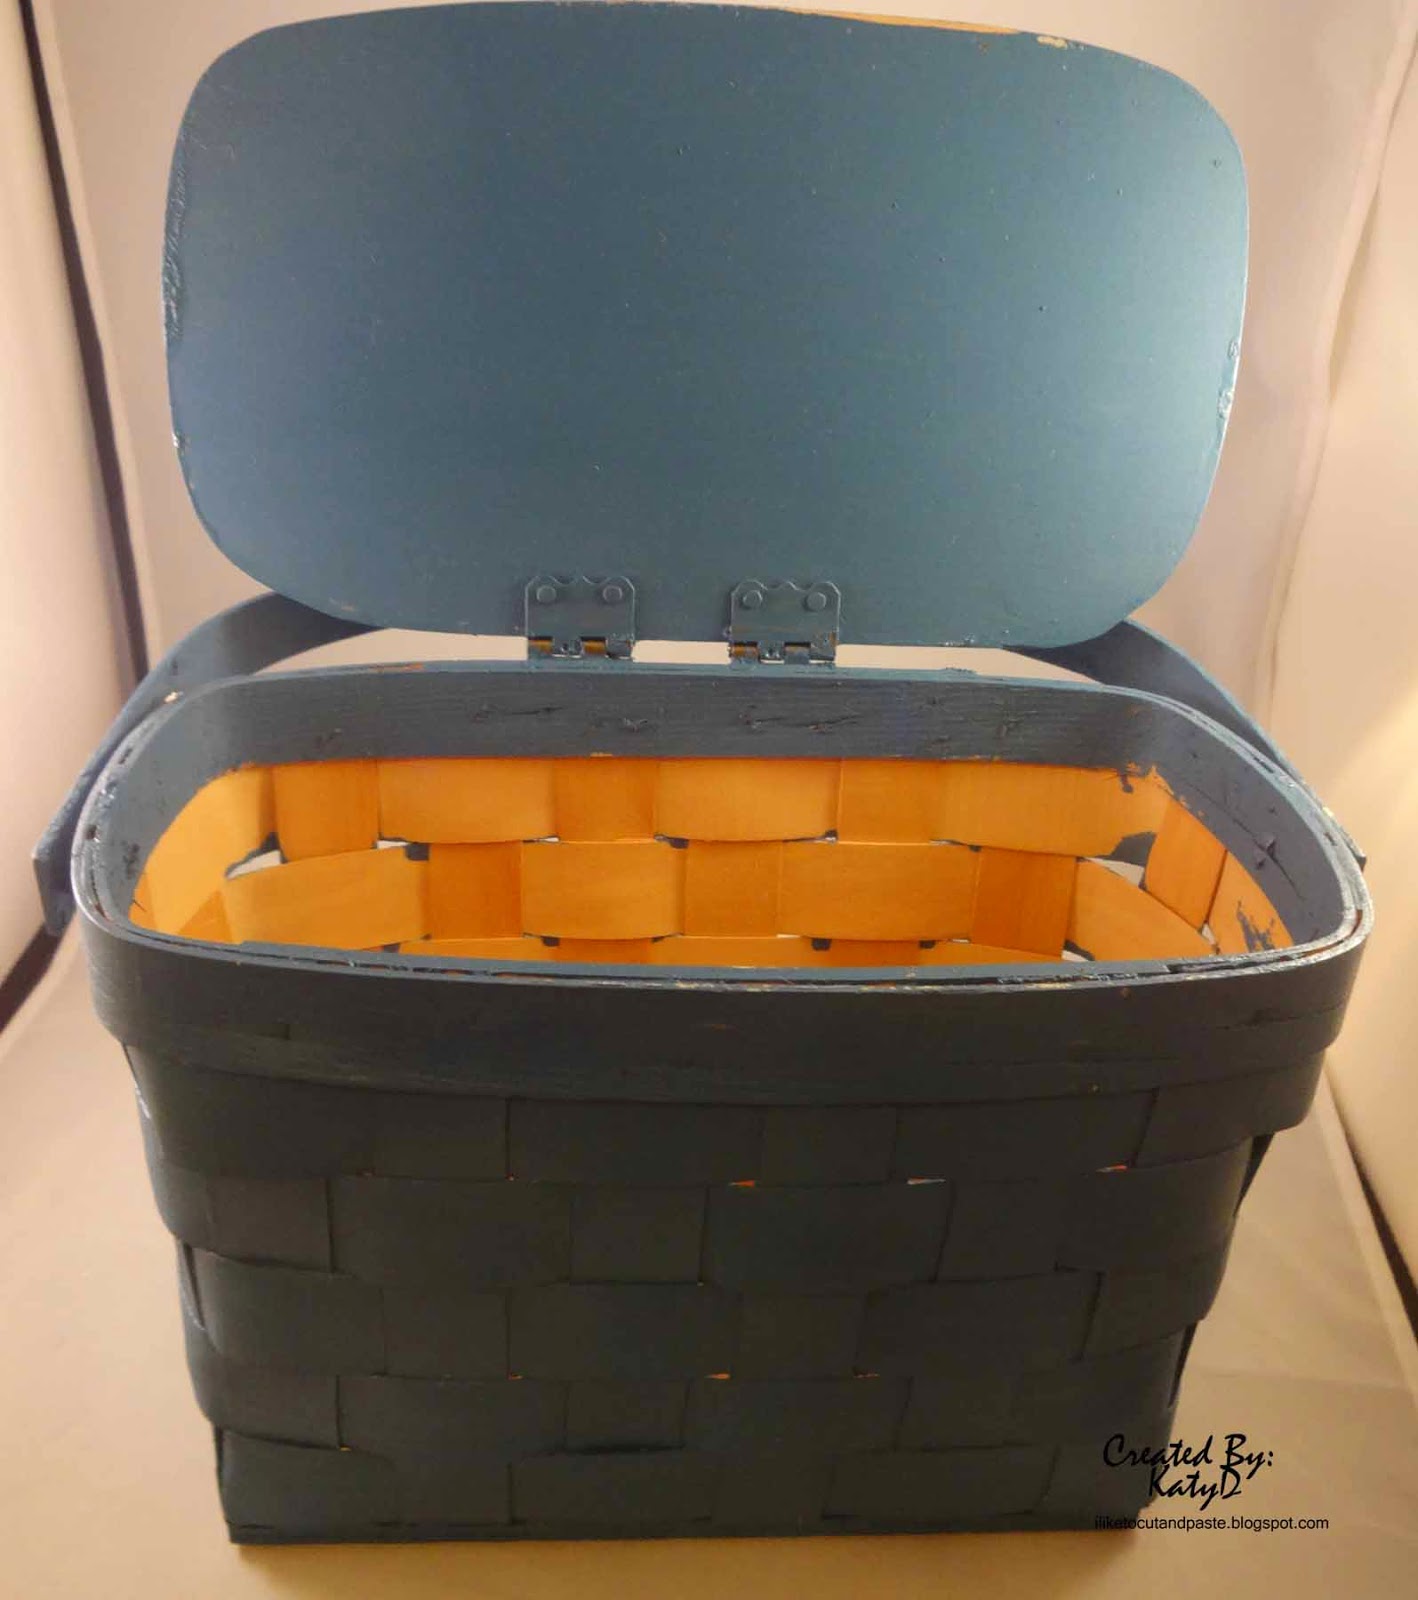
I found this could little basket at a thrift store for $3.  And it was on sale for half off!  Friends-it really doesn't get any better than that! :)


Here is the inside so it looks like someone painted it-just like I'm gonna do! :)


First I applied a coat (or two!) of gesso.  Then I mixed white and "latte" together to get the base paint for the basket.  Then I sponged a brown over the basket.


So here is my finished basket.


Here is the Lock and Key-I think it is so nice! I inked it red then I put a pink it over it.  The Inka Gold is on the key (I love that stuff!) :)


Here is a close up of the lid.  I added a plastic rose and the canvas flower on the right.  The polka dots are light modeling paste mixed with Pretty in Pink Ink Refill from Stampin' Up.  And the J!


For the J I used glossy accents and the vintage glass glitter from Melissa Francis.  And my friend has 4 kids so I wanted to honor them with little butterflies.


Here is the inside of the lid.  I love the praying hands and cross but I didn't know how to paint it.  So I left it, and I am glad I did. 


Here are the products that I used.  The gloss gel medium is what I use to adhere my wood embellishments.


Thank you for stopping by!  Be sure to check out the Unique Laser Designs store!  And for more inspiration we are on Facebook and Pinterest! :)


Sunday, June 8, 2014

Sing Your Song

Hello all my fellow scrappers, today I am going to show you a really gorgeous little project I did for my daughter.  She loves to sing, so I came up with this little frame which matches the colour of room.


I did this last night while she was out, and popped it into her room before she came home, she was absolutely thrilled with the frame.

I just bought the frame from a really in-expensive shop (cost about $5.00) and then popped some cardstock where a photo would normally go and stuck the sticker down on some Transparency (just in case I made a mistake),

Then I got onto the gorgeous butterflies, (I used a mixture of different butterflies)  I painted them in white acrylic paint - I gave them two layers on the 2nd layer before it got dry I sprinkled some glitter onto them.


Once they were dry I glued them directly onto the glass, I also used some circles from Kenny's Bag #3.

I just love the way it turned out especially with the glitter on, it just sparkles so beautifully.

TFL & happy scrapping
Heidi


Monday, May 19, 2014

Keychains and Earrings

Ready for another fun project using Unique Laser Designs products? Today I have some super easy, super fun, and super cute key chains plus a set of earrings, all made using the same process. So lets get started on how these were made.


First, we gather our supplies.  Wire cutters, beading pliers, head pins, jump rings, beads, wine cork, Unique Laser Designs butterfly (I pre-drilled two holes in it), eye screws, and your choice of inks and adhesives.


Start by taking a head pin and adding on several beads.


Next, using the wire cutters, cut the head pin, leaving approximately 3/4 inch above the last bead.  Then, using the beading pliers, bend the top of the head pin to form a loop.


Repeat the process to make a second link of beads.


Using your choice of markers or inks, add color to your wooden embellishments. I chose a butterfly from the Unique Laser Designs collection.


Now to connect all the pieces together using jump rings.


Color the wine cork using a shimmer ink.


Add eye screws to each end of the cork. Because the cork is fairly soft, you will need to add a strong clear drying glue to the eye screws to make sure they do not come out of the cork.


Using another jump ring, attach the beaded link to the cork.


Attach the key ring to the second eye screw using a jump ring.


Lastly, I used a chalk pen to add details to the butterfly.


Using the same process, I created a second key ring using a gorgeous teal color and a heart wooden embellishment.


How cute would these be holding your car or house keys?


The same beading process can be applied for jewelry also.  These earrings were made using stars which were painted silver, then sanded for an aged look, then added to a beaded link which was then attached to earring hooks.