Showing posts with label spring. Show all posts

Thursday, March 19, 2015

EASTER CARDS

Hi everyone, Martha Lucia here with two Easter cards to share with you. I am using the Easter Eggs to create my cards and of course pastel colors and a few sweet elements that I will show you. Here is my first card:


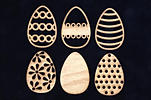
To make this card I am using the Easter Eggs that come in a package with different designs. This product is available in two sizes and two materials, wood and chipboard. I used the smail size, 1"x1-1/2".


In this opportunity I decided to coloring my pieces with Yasutomo Pearlescent Watercolor Set. I gave a different color to each easter egg.


I painted each egg with a paint brush using the watercolor technique and several coats of pearlescent to accent the color.


After I finalized with my easter eggs, I cut the card base using a piece of Crumb Cake cardstock of 6"x12", a piece of Blushing Bride of 5-3/4"x5-3/4" and a whisper white piece of 5-5/8"x5-5/8" to create the layers.


To decorate the third layer I used a stencil with big dots and blushing bride classic Ink with a sponge.


After this, I cut two pieces of grass using my cricut explore and a photo frame using the On Film framelits.


Now I had all the pieces to put together my first card so I started to assemble the second and third layer, tied two loops of baker twine and pasted the frame and grass over them 


After this, I pasted my easter eggs with a liquid glue and decorated with some paper flowers and stamped my sentiment.


As you will see, I didn't use all the eggs that I colored. So here is the last one in my second card. A clear and simple model that I created using the scraps of my fist card. 


To create this card, I just stamped a border image several times on the bottom part using a Cherry Blossom PowderPuff Chalk Ink. Then I pasted my Easter Egg on top using a liquid glue.


To finalize the decoration I cut a whisper white piece of card stock, I created a border over it using a Edgelits  and stamped my message with Melon Mambo Classic Ink. And I pasted a button on the left side with a bow of bakers twine and a little piece of grass over my Easter Egg.


Materials:

I hope you like these ideas, with these Easter eggs you can create whatever you want, using different techniques ideas.

See you soon with other idea to make together!

Martha Lucia

Thursday, February 26, 2015

LOVE BIRDS IN A BRANCH CARD

Hi everyone, Martha Lucia here with another fun card to share with you. In February love is in the air, and I found that these Love Birds are perfect for this fact.


To make my card I am using "only" one piece from Unique Laser Designs, I said only because I want to have everything. This is a gorgeous cut called Love Birds, available in wood and chipboard. I used the chipboard presentation.


I decided to give each bird different colors using chalk ink in soft colors. I used the New Collection of PowderPuff Chalk Ink of Quick Quotes in the colors Peach Tree, Latte, Antique Linen and Cherry Blossom from right to the left. For the branch I used two different tones of green Faber Castell PITT Artistic Pen big brushes.


Note that I applied the chalk ink directly to the each bird and I masked each color to avoid any mixing. For the bird beak and eye I used a Crumb Cake Marker, just to intensify the color.


With the same marker I colored the letters that come inside of the Love Birds to made the Kraft color more intensive.

Now that my central piece was finalized, I cut two different borders in Whisper White cardstock using a Leafy Border from Memory Box and Foliage Border from Darice, to use them on the bottom of my card. And for the body of the card I used  a plain cardstock for the base, a designer series paper for the second layer and a third layer of vellum to made the colors of the designer paper more soft.


I assembled all the pieces with snail adhesive and glue dots and finally pasted on top the Love Birds with dimensionals.


To make my card a little more delicate I pasted a few lilac pearls in the center of the flowers of the Designer Series Paper.

Materials:

  • Love Birds - Unique Laser Designs
  • 2015 PowderPuff Chalk Ink - Quick Quotes
  • Faber Castell PITT Artistic Pen
  • Leafy Border - Memory Box
  • Foliage Border - Darice
  • BigShot
  • Cardstock
  • Designer Series Paper
  • Vellum
  • Pearls
  • Snail Adhesive and Dimensional

I hope you like this idea, because working with these laser cuts is very fun and you can create whatever you want, using different techniques and process or simply leaving the cuts in their natural stage.

See you soon with other idea to make together!

Martha Lucia

Monday, February 23, 2015

Lucky Charms


The luck of the Irish is with us today in my Lucky Charms project! 


I started with this adorable wooden bicycle laser cut from Unique Laser Designs,  This is the Ladies Bicycle, W-1045, in wood.


Then I selected a few Mini Covers and a horseshoe,  The clover with cutouts were a special order item.


I chose a pretty Irish shamrock pattern, and adhered it onto a black card stock background. I arranged a few wooden die cuts to get an idea of how my finished piece wold look. I imagined a magical, enchanted bicycle, flyin through the woods with lucky charms swirling around in its wake.


I painted my wooden pieces with acrylic paints. I love the way the bicycle turned out, and it was easy to paint too. I used glitter on the "charmed" pieces!


I then added a few paper die cuts as well, like these small hydrangea blooms, from Poppystamps.  They made a nice addition to the springtime feel of the card.


Add a few tulips, a cheeky squirrel, and a couple of emerald jewels for a magical look!

Thank you for joining us today at Unique Laser Designs!

Live your life in color!


Materials Used:
Unique Laser Designs (ULD) Ladies Bicycle, W-1045, wood,
Unique Laser Designs (ULD) Daisy - Chubby,
Unique Laser Designs (ULD) Clovers (Sm),
Unique Laser Designs (ULD) Horseshoe
Black, green, pink, yellow, brown card stock
Shamrock pattern paper
Poppystamps die cuts: Small Hydrangea Blooms, Frisky Squirrels, Tulip Fanfare
Green jewel bling


Thursday, February 12, 2015

ROSE FOR SPRING CARD

Hi friends, Martha Lucia here with you to share a sweet card with a Rose Cut Out in chipboard, one of the great products from Unique Laser Designs that I used to create my card.


This is the original Rose without any alterations. This flower  called Rose is available in MDF, Chipboard and cork. Also in two different sizes, 4-1/2"x3-1/4" the size that I used and 2"x1-1/2". In any form that you decide to use it´s beautiful, because you can decorate it with a lot of techniques to get different looks and textures like I made with mine.


This time I decided to work with PowderPuff Chalk Inks from Quick Quotes Scrapbook Company. Their colors are vibrant and the texture is very soft at the same time. 


I applied the color directly from the ink pad over the flower. I started with the leaves using the colors Soft Sage and Kakhi. Then I continued with the body of the flower, using the colors Coral and Orange Slice. The PowderPuff Chalk Ink dried very quick and when I was satisfied with the color, I covered the entire flower with Wink of Stella Brush to give it a bling.


To finish my card I created a base with Pistachio Pudding Card Stock with a second layer in the same color. I made a dry embossing to the second layer using a Plaid Background Embossing Folder and inked it with the same color of Classic Ink to create a tone by tone background. 


To give m card a more delicate look, to go with my Rose, I cut a piece of Vellum Card Stock, I pierced the vertical borders and stamped my sentiment on top with Versamark and Embossing Powder Wild Wasabi. 


Remember to heat the vellum when your heat tool reaches a stable temperature and to always heat from behind to avoid the paper bursting into flames.


After this, I pasted the vellum centered behind the Rose with glue dots and covered the glue dots with  little pearls.


Working with good quality products and finishes from Unique Laser Designs definitely makes our creations representative of us and allows us to express our creativity in the est way. That's why in the ULD Store you will find a wide variety of products for all styles and activities. I invite you to visit the ULD Store to fall in love with all of them like me. 

Se you soon with another unique project specially for you!


Wednesday, April 16, 2014

Hopping into Spring wreath


Spring is here!  I'm trying really hard to ignore the snowflakes blowing through the air right now.  But, what makes me really excited is that I get to introduce myself as one of the members of the first ever Unique Laser Designs Design Team.

My name is Kelly Starsky, and I am a busy mom to 4, wife to 1, dog-mom to 2, pediatric physical therapist, crafty chick, artist, pathological picture taker, painter, cook, baker, multi-tasker, and now a Design Team member of Unique Laser Designs! And, oh yeah...I'm the crafty neighbor! I've been creating ever since I can remember. One thing hasn't changed--I still LOVE purple. Scrapbooking is my first love, but I dabble in lots of different art. My newest addiction is gelatos--the kind you color with, not the kind you eat (but I would probably like that too). 


I have been on a "wreath kick" lately.  Some of my door decorations have seen better days and I decided that I needed to add something fresh and bright since the calendar says SPRING!

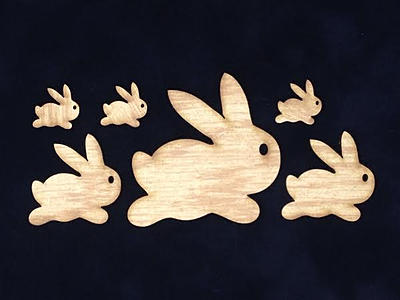
I added some ribbon and material scraps to a plain embroidery hoop (this one is 10 inches in diameter) and it makes a happy home for these decorative bunnies from Unique Laser Designs.  I just added some bright spring colors (sage green, coral, orchid, and periwinkle blue) with acrylic paint and then hot glued them onto the grassy hoop.  A lacey bow finishes it off and my door has gotten a much needed spring makeover.  This project is so quick and easy and you could do this with any of the adorable shapes from Unique Laser Designs (like the bees, butterflies, or birds)--check them out HERE.


Don't forget about the April Challenge right here on the Unique Laser Designs blog. You can join in the fun by showing us your creation made with any wood or chipboard embellishment.  You can play along even if you haven't ordered anything from Unique Laser Designs---yet!


So, does your door need a makeover?
Please share--we'd love to see the "big reveal"!


www.kellystarsallthingscrafty.blogspot.com


Pin It

Wednesday, April 2, 2014

Wishing for spring wreath


My wish...SPRING!
Oh spring, spring...where for art thou spring?

I created something springy and crafty last week, but it really didn't seem to have any effect on Mother Nature, so I'm trying again. This time, I'm making a wreath to grace the door and scare away the winter spirits.  And I'm using ADORABLE spring shapes from Unique Laser Designs!

First, I took a straw wreath and wrapped and wrapped it with this pastel variegated yarn.
Next, I took some canvas flower shapes from Linnie Blooms,  I colored them with gelatos (pink and orange), and spritzed with water so I could spread the color with my fingers.  On some of the flowers I added LOTS of color, some just a bit.  Some are more orange, some are more pink. A flowery hodge-podge!
Next, it's painting time!  I painted these ADORABLE Easter shapes and letters from Unique Laser Designs.


I "marble-ized" the solid egg and bunny by blending gelatos over the dried acrylic paint and then splattered the letters with pink paint after covering them with a few thin coats of Distress Stain Picket Fence.


This is my ode to spring.  Mother Nature are you listening this time?


I couldn't stop playing with these adorable shapes, so I'm tucking in a few more ideas if you get a few minutes to play.


Pin It