Monday, June 30, 2014

Chimes Time

Hello Everybody!

I am super excited to show you what I made with Unique Laser Designs today.  There are a lot of pictures so get ready!  :)

I made chimes!  Here is a picture of the chimes.  I will show you what I was inspired by and my different "findings" that add an eclectic flair.


It all started with this Deco Frame-Rhonda.  I thought oh this will look great on a scrapbook page.  So I am looking at it and then I change the direction that I am holding.  And then it hits me-This could be the base of chimes.


So first I paint this frame with white acrylic paint.  And then I realize I should paint it black!


While that is drying I go through my scrappy things for "findings"--the fun stuff that will bring this to life.


So I put this aside and get out silver beads and some beading wire.  Alert-I do not make jewelry but I have a few little things from projects and Halloween costumes-that's how I have some of these things.  :)

I start tying knots and then I strung about 21 beads and tied it to the other side of the flower.  I did this all the way around the frame.  This is tedious but I loved the result-so totally worth it! :)


There is movement in these beads which is perfect for chimes.  I used several strands too-it was not one long strand of wire that did all of these scallops.


The next step is to pick what fun things your are going to string onto the chimes.  This was super hard for me.  So many fun little things to choose from!

In this picture you can see the little white beads.  For the string here I used black embroidery floss-with all of the strands.  These beads have big enough holes to fit over the floss.  Then I added bigger beads and a charm.  This idea of tying the floss to the frame first came halfway.  I was doing the strings then tying them on.  The creative process isn't always a streamlined process.  ;)


The next 2 pictures show the strings of the chimes.  I put some bells so there would be a little jingle.  And do you see what I see?  More Unique Laser Designs pieces!  I used the bird cage and the watering can.  


Here is a different angle.  There are different beads and a star paper clip.  For the ULD cut out pieces-I didn't paint those.  There are some wooden beads too.  I like the wood and the metal and the plastic together.  These elements seem to be working together-Yay! :)


Here is another picture of the chimes "hanging up."  I used a dyed seam binding ribbon for the top so that I can hold it but eventually so it can be hung up.


Here is a downward shot of the chimes.  There is that Rhonda Deco Frame that we started with! 


Here are a few more pictures of the chimes.


I love all of the things you can do with Unique Laser Designs!  What will you do with them?  :)


Sunday, June 29, 2014

Recipe from the Past...

Hello.................Debbie/ StudioBeeCreations here...
with my last posty as a Design Team member for 
*****************
****

As soon as I saw the kitchen tools & spoons...I started designing this canvas piece.
I knew I had saved a recipe book given to me by my Mother-in-Law...
it was one of those church fund-raiser books where the ladies submitted their favorite recipes.
I thought this would make a GREAT gifty for family members for Christmas this year ( never too early to start!!)....I was able to copy many of the recipes submitted by Janet (MIL) and HER Mom...Marion Boldry.
We called her MoBo...and boy howdy could she cook!!
Using the awesome cut-outs from ULD...this will make a great memory piece for each family member.
I started with my Gelli & deli paper ( I can't stop myself!)....and decided to keep the ULD pieces "natural" and let the beauty of the wood show through. 
I will be placing my order for lots more of these super ULD products!
**************
I want to thank the design team and 
UNIQUE LASER DESIGNS for wonderful inspiration over the past months!!
It's been a GREAT Creative Ride!!

creative blessings,
Debbie

Saturday, June 28, 2014

Altered Frame

Hello everyone!! I'm excited to be back with you today to share an altered item I created. I really hope to inspire you to take a second look at thrifting, and the things you can create with these treasures. 
What you will see here is the result of a simple frame purchased from the thrift store, turned into a mini album/shadow box.


After distressing the frame and adding the bracket to hold the pages, I began embellishing each page.  I used Unique Laser Designs DF Fran Frame on the cover.  This frame will eventually hold a picture of my son while he was on the beach.


Here's a close up of the distressing I created on the frame using Tim Holtz distress embossing powder.  This particular embossing powder gives the frame a rustic color and texture at the same time.  Almost like a sand type texture.


The second page is reserved for journaling, or a small picture and journaling.  To add a different flare to the floral embellishments, I decided to use feathers instead of leaves to highlight this page.


Here's an up close look of the feathers.  I love that the shape of these feathers compliment the leaves of the trees in this picture.


The following page boast a large feather, which I absolutely love.  Just the right touch for the small page and again beautiful against the leaves in the picture.


Here, I added a portion of the honeycomb stencil to the page.  The wooden honeycomb looks perfect against the honeycomb pattern in the background.  Distressing the honeycomb was truly easy being it has been used on a variety of projects, and already had many colors on it. All I had to do was add a few spritz of blue and yellow to help tie it in to the colors on the page.


Here's a peek of my final page; fairly simple with low layers.  Because this picture is so beautiful, I didn't want to take away from the scene. Guam is truly a beautiful island!

And finally, here is the shadow box portion of my frame:


I had a major ball embellishing the inner portion of this frame.  Instead of sliding the glass back into it's slot, I used E600 glue to adhere it above a section of the frame.  This created a shadow box effect, filled with sea shells, notecard, beads, etc.


Products Used:

Honeycomb Stencil (and one word filler)

Friday, June 27, 2014

Up, Up, & Be Happy!!!!

Hi there crafters!
Rachelle here sharing my latest project using


I went with a card.
"Be Happy"

Started off by simply painting each cut out,
then applying gloss varnish to make them really stand out.

 Next, after the cut outs dried I began creating the
card using white cardstock.
I used a edge punch and added a thin piece
of Echo Park The Record2 cardstock. I then added
more die cut clouds and light blue ink for
a sky effect.

 Finally I added the "be happy" stamp and a few
embellishments.
All done!!! 

I hope you have be inspired to create something special
using wood cut outs from
You will be glad you did.

Thanks for stopping by today!
See Ya Soon!


Thursday, June 26, 2014

Believe in Yourself Canvas

Hello ULD fans, Michelle here with a fun uplifting wall canvas featuring some great laser cut pieces from Unique Laser Designs.


This piece features the hot air balloon, clouds and the cutout Believe in Yourself.


I used my prisma colored pencils to color all the ULD pieces.  Here's a close up of one of the clouds.


I love this hot air balloon, so many options for how you could use this.


And this turned out a bit more patriotic than I planned but it is almost the forth of July!  Again I used colored pencils to color this piece.


Hope you have a bright day.

Thanks for looking!


Wednesday, June 25, 2014

Small in size, BIG on wishes


Dropping in with some cards that are "small in size, but BIG on wishes" today, all using small wood embellishments from Unique Laser Designs.  For all of these, I used a card base of kraft paper that is 4"x4" inches (when folded).  I used washi tape as the background (SO quick and easy), and then colored my wood embellishments with Copic markers.  I added a layer of Glossy Accents to give them a shiny dimension.  I LOVE this bird on a branch---he is simply cute!


For this turtle card, I colored him with Copics, popped on a googly eye, and then added a layer of sparkly green micro-glitter.  For those birthdays you (almost) forget...the outside reads "this birthday card is not late", the inside says "it's just slow". 


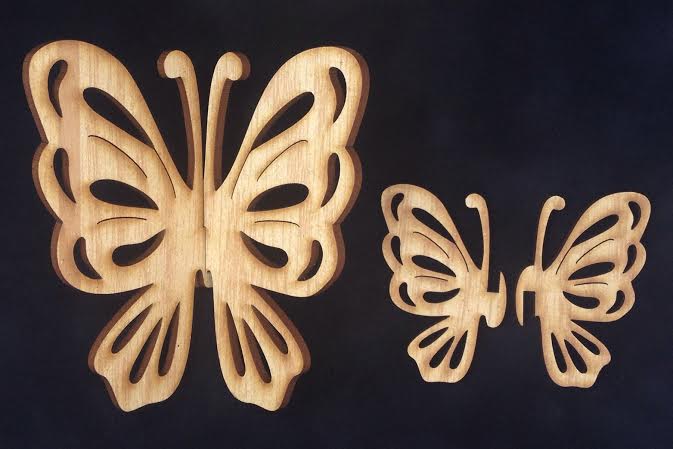
I pushed colored clay into the spaces in this 3D butterfly and then blinged it out with some Glossy Accents and glitter glue on the antennae.


Do you recognize that sentiment below the butterfly?  


 This 3 piece cupcake is sweet and looks good enough to eat!  I used white ink to color the frosting, Copic markers for the cherry, and an icing of Glossy accents sprinkled with micro-beads.


Using these adorable shapes from Unique Laser Designs makes the "recipe" for these cards quick and simple.  It will have you coming back to make seconds (and thirds, and fourths...).      

Tuesday, June 24, 2014

Pirate Bookends

Hello ULD Fans!

Are you ready for an adventure?  Let's Go!  :)

Today I am gonna show you these bookends that I made using Unique Laser Designs.  They turned out pretty cool-I hope that you think so too!


I bought these bookends at a yard sale.  They were like a $2.  Now I am not good with saws or drills or anything like that so I thought these were just the perfect little things that needed a little love--a little ULD love! 


Here is a side view.  My initial concern was that the pieces couldn't be flat against the standing "wall."  If they are on a book shelf you wouldn't be able to see it.  Then how could I create a 3-D look?


I painted the bookends in gesso first.  Probably 2-3 coats.  I wasn't sure how I was going to decorate them so I had to be ready for anything!


I like to see how people plan things out-what their process is.  It's not always easy to record.  But here is how I planned out where things would go.  I did the pirate ship on one side.  Here are the pieces that I used:


The treasure chest and the other palm tree on the opposite side.  I wanted to use the clouds but later as things came together I didn't need them.  Clouds for another day! :)


Here I painted the sky and water on the bookends.  I used craft acrylic paint.  The water blue is a metallic which I think is really cool.   Also, I used a craft sponge and blotted some clouds on the sky using white acrylic paint.


 Originally, I thought I was going to hot glue the pieces onto the bookends.  And I was trying to think of ways of hiding the glue.  Sometimes when I use hot glue it can be thick.  But I figured something out!  I have light modeling paste which I normally use for stencils.  But it has the word paste in it.  I also have gel medium.  Gel medium is used for thinning out acrylic paint but also has an adhesive.  Experiment time!

First I made sure I knew where the 2 palm trees and chest were going to touch on the bookends.  Then I had an idea where the leaves of the trees could touch the top part of the bookends.

I made a stencil for my island.  I free handedly cut an island.  Then I took out a good bit of paste.  I wanted this to be a distinct island.  But this isn't a white beaches island ;)  So I mixed 2 drops of So Saffron Stampin' Up Reinker and mixed it really well.  That is what gave the color of the sand.  (In the picture there are 2 reinkers but I just used the one.)  I spreaded the paste on thick.  On the other side I put another island but much smaller for the other palm tree.  I placed the trees and chest in their respective spots.  For the palm trees I put some of the gel medium on the edges that touched the vertical part of the bookend.  Then I went to bed so the paste would dry completely.  For the pirate ship I put the gel medium on the bottom and placed it in the "ocean."


Here is the up close on the treasure chest and palm tree.  I painted them which craft acrylic paints.  The pieces are so well designed with detail lines that you just pick the colors and start painting.


Here is the pirate ship.  I used Tim Holtz's Distress Crackle Paint on all of the sails.  But it is so thick it started to cover up the skull and crossbones.  So I wiped it off and used my other white paint.  Then the colors were really off.  So I painted the skull and crossbones back onto the sail and painted just that sail with white paint.  What is cool is if you look closely you will still see some crackles.

Also, I wanted to tell you that I did not gesso these 4 pieces.  Say what?  I know--I love gesso!  But just I like the look of just paint.  In this application it works nicely.


Here's another look at the finished bookends.


 Look!  The really do work!


Thank you for stopping by!  Make sure you stop by everyday.  There are so many wonderful and creative projects here!  The DT makes them especially for you! :)