Wednesday, April 30, 2014

Craft Fair Decor

Do you embroider? Do you love embellishing unusual items? Maybe you even have a couple or a lot of items with no specific creative idea of how you will utilize it. Well let's take a look at embroidery hoops, they are not just for embroidering anymore...so let's take a look.


I created this LO "so to say" to be used as decor for craft fairs I will attend. This is an item that will be easy to display, install and remove, perfect for booth decor.


Here you can see the wood circle pattern I used on my LO. The circle pattern comes in 5X6 rows, which makes it easy to use a little or a lot on your project. Just simply cut (using heavy duty scissors such as Tim Holtz tonic) the desired amount adhere to your project.


These feathers are simply love cut out of wood! Just as the circles used above, I left the feathers unaltered because I love them as they are. The wood alone add so much texture to the project that there's no need in adding mediums. Although adding embossing powder to the feathers is absolutely beautiful.


To display my embroidery hoop I've added burlap twine to the closure.  This makes for easy tying and removal without disturbing my bow.

Products Used:
Unique Laser Designs:
Feathers - W-1072S
Circle Pattern - Custom Request

Other Products:
Canvas
Variety of Patterned Papers
Light Molding Paste
Helmar Adhesives
Pearl Pins
Lace & Pearls
Florals & Feathers


Kisha

Tuesday, April 29, 2014

Turn your tags into a chalkboard


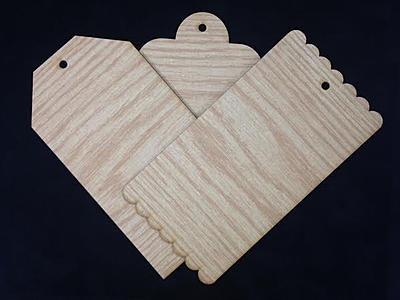
 Chalk art is hot, hot, HOT right now, and I am incorporating some wood tags from Unique Laser Designs into the trend.  


I covered the tags with 4 coats of  chalkboard paint and let them dry for a few hours.


To decorate and give them that "chalkboard" look, I used white acrylic paint and a white gel pen.  You can also spot that there is an adorable red heart from Unique Laser Designs that I pre-colored/scratched with a burgundy gel pen and then pressed into a red ink pad.  The "mom" and the "Jennifer" on these tags are written with real chalk and can be erased and re-used.  So cute and perfect timing for Mother's Day--don't you think?  I'm going to hang that "I (heart) Mom" tag on a big hanging basket of flowers for my mom.

Have you made your mom something yet?  


Monday, April 28, 2014

Smile Necklace Holder

Welcome back! Are you read for a beautiful home decor project using Unique Laser Designs products? Well today I have a project using a simple canvas and turned it into a piece that anyone would be proud to display in their home.  This could be used to hold bracelets and necklaces, or keys, or any other lightweight item you can think of.  So let's get going and I'll show you how it was made.


The canvas I used was 8x8 in size and 3in deep.  Simply paint the edges and partway onto the top of the canvas.  I gave it two coats of paint.  


Once the paint is completely dry, adhere your selected patterned paper.


Using a dry brush technique, add more paint around the edges of the patterned paper.  Set aside to let the paint dry.


To add a bit of texture to the background, I adhered some white ribbon.  Since the ribbon is really wide, I simply cut strips through the ribbon to have varying widths.


Now on to the embellishments.  I chose three dress forms, two of which were inked with Distress Ink and the last was heat embossed.


On the two dress forms that were inked, I also added a thin layer of Glass Bead Gel Medium.  Don't worry that it looks milky right now.  Once the gel medium dries, all you will see is clear mini beads which add a wonderful texture.


Now to start putting everything together.  Once the gel medium was dry, I arranged the three dress forms together then added in a few flowers. I also added in a bird, which I left bare except for a spritz of shimmer spray.  Lastly, I added in the sentiment, which I also left bare.  I thought the bare wood was a good color considering all the other bright colors on the canvas.


The last thing to do now is just to screw in seven cup hooks across the bottom of the canvas.


The hardest thing for me now is to figure out if I wan to keep this all for myself or give it as a gift. What do you think?


Sunday, April 27, 2014

Spring Wreath

Hi there!
Rachelle here sharing my most recent project for

Spring is here and it's time to change the wreath hanging
 on your front door.

Let's look at this one!

Spring Burlap Wreath
{The Cross is the wood focal point}


This Cross displays the beginning biblical scenes
which I painted individually.
The top shows Adam & Eve in the Garden of Eden, 
clouds, trees, plants, and animals.


 The center displays the sunshine, water, the earth, moon and stars.

Then we see God holding up the world, moon, and sun.

Next, I started placing the burlap on the wreath. Each piece has a decorative pearl
stick pin and a center burlap with satin ribbon. 
Finally, I placed curl twigs and butterflies on the side for added decor.
The Cross is a beautiful piece from

There we have it
a spring wreath!

That's it for this post.
Thanks for stopping by and remember you can get the Cross
and more from
 See Ya Soon!

Saturday, April 26, 2014

MR & MRS

...hey there!!....Debbie with StudioBeeCreations...
here I have my latest canvas using several
pieces.....I am soooooo in love with this awesome product!
GREAT for cardmaking...scrapbooking and MIXED MEDIA canvases!
I took a 12x12 primed canvas...and layered it with wallpaper samples, and stitched on vintage BARKCLOTH couple...along with a vellum bible verse from my stash...some vintage lace and applique' cut from an antique wedding dress...along with antique mother-of-pearl buttons.
I started with the ULD MR&MRS and then went back with the  ULD curley corners and frames.


I painted and embossed the MR &MRS and decided to leave the swirly-o's "naked"....because this product stands beautifully on its's own!!
As a DT member, I receive product...however...I have to say...I am soooooooooooooo in LOVEEEEEE with Unique Laser Designs..that I have just placed an order ( and received lickety-split!) to use in many of my up-coming ART canvases and blocks for my shows!
The "cabinet card" is from the Tim Holtz line(uber fun!)...and works well with this vintage theme!
StudioBeeCreations is always available to do special works of art and one-of-a-kind gifties!
email me@ studiobeecreations@live.com


creative blessings,
debbie


Friday, April 25, 2014

Owl Wall Hanging

Hi there, Michelle here to share a wall hanging I made using Unique Laser Designs products.  I started with this cute owl cut out and some letters.


With a little paint, a little glue and a little glitter, here's what I created.


I painted the letters black then covered with black glitter.  I painted the owls purple and pink,  I covered the purple with a larger translucent glitter, then covered the pink whit a bright pink glitter.  

Hope you enjoyed this as much as I did making it.

Thanks for looking!


Thursday, April 24, 2014

The Little Things!

Hi there crafters!
Rachelle here today sharing another 
Unique Laser Design project I created.
With that let's get started.

If you have forgotten spring is here. How can you tell?

Look here:
 photo UniqueDesign-thelittlethingsladybugs.jpg
"Enjoy The Little Things"

I started this project by painting the tree, butterflies, and ladybugs.
All from
Unique Laser Designs.
I paper punched the cardstock to look like a fence.
Then I added a white fence I made from my stash.

More Views:

 photo UniqueDesigncloseviewrightsideladybugs.jpg

Next, for the dots on the ladybugs I used cotton from Q-tips, inserted
through the holes and dabbed each with black paint. Then put on the eyes using white paint.
Using wiggle eyes is another great idea too.

 photo UniqueDesign-closeviewladybugs.jpg
 
Next, I added grass and little tulips The first ladybug is attached to wire so that
it appears to be flying upwards, away from the others.
Simple floral wire works great. It gives the ladybug a wiggle affect.
Finally, I added the title, a cute little bow, pearl, and a tiny butterfly.

There you have it!
I so enjoyed creating this project and as always working with
Unique Laser Design products.
I just love it!

That's it for now. Thanks for stopping by and remember
to join the April Challenge going on now.
Don't forget to visit
Unique Laser Design website
for all your wood products.
See Ya Soon!


Wednesday, April 23, 2014

Altered suitcase

Hello! This is Maya here and today I will share a cute project featuring Unique Laser Designs Rose deco frame. This design is so pretty that I thought it will look great as an embellishment for a box cover.

I found small paper suitcase at Target. The suitcase itself was green and the cover was kraft.

I glued the frame to the suitcase cover using a strong adhesive. I actually like this naked look as well but I decided to go one step further. I painted the cover using acrylic spray paint in lilac.

I than colored the rim of the suitcase cover with Faber-Castell big brush marker in manganese violet. I used the same marker to color the butterfly. To add a little shine I misted the butterfly with deep plum Glimmer Mist.

I pulled out my purple bling box and added pearls, jewels and acrylic rain dots.

Here it is - all ready to hide fun treasures or to be given as a gift to someone special.

Don't forget to join us in April challenge. It is so easy and you don't have to own Unique Laser Designs products to participate.


Tuesday, April 22, 2014

Additional embellishments not needed.. I have ULD!

One of my favorite things about using the Unique Laser Designs wood embellishments on my projects is that I really don't need to add more embellishments.  The wood designs can stand alone and can finish off any project. 

Here are just a few projects where I really just added a coat of paint and let the Laser Designs stand alone as my embellishments.. after all Unique Laser Designs says... Embellishments are their business..


I used a saying: Believe in Yourself and a
 heart that came with the heart puzzle, 2 cute ULD
images that worked great together.

Here is my canvas layout where I only used ULD as my
embellishments. 


A dress form and 3 stars.. finished off these 2 pennants.

My favorite #2 & a mini heart.

A finished burlap & canvas banner, show case many of the ULD embellishments.

simple tag using 2 ULD stars.

 
Please visit the rest of our blog to get more ideas from the other designers.  They really know how to inspire, create, and design.