Showing posts with label Layout. Show all posts

Monday, March 16, 2015

Life is Better at the Beach Layout

Hi, this is Erin!!  In June of 2014 we took a little trip to Galveston beach, and this was the first time Catherine has been to any beach before.  She was not sure about the sand, or the waves, or really any of it, but she soon fell in love with anything and everything to do with the beach.  Catching crabs, fish, digging holes, sandcastles, and splashing in the water soon was her favorite pastime with her brothers and cousins.  We went to the beach 2 times that day, and in the evening her aunt Suz brought her camera and snapped this pic, so perfect!!


I used the wonderful wood products from Unique Laser Designs to enhance this project.  The wood just adds to the wonderful dimensions and design of the layout.  I used the "Gulls" and "Corner G" in wood for this project.
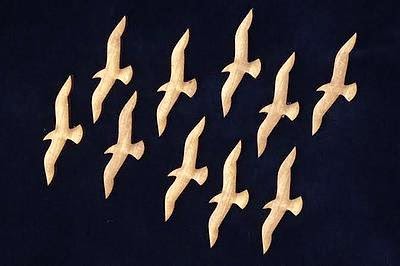
http://www.uniquelaserdesigns.com/#!product/prd1/1841034925/gulls-%2810pc-set%29 

http://www.uniquelaserdesigns.com/#!product/prd1/1743213895/corner-g-%28set-of-4%29


I pressed the raw wood into Versamark ink to make it sticky then painted on a medium brown mica powder to make it shimmer but also fit with the layout.  I did not want to too shiny, it would not mesh with the feel of the project.  I did the same technique to the pearl swirl to ti would match the layout.


Supplies Used
ULD Wood Gulls
ULD Corner G
Cardstock - Canvas Home Basics
Patterned paper - Canvas Home Basics
Burlap  - Canvas Home Basics
Cardboard -  Canvas Home Basics
Clothespins -  Canvas Home Basics
Mini Bags  - Canvas Home Basics
Jute -  Canvas Home Basics
Metal - 7 Gypsies
Mists - Tattered Angels 

Mica - Imagination Crafts
Pearls - Prima
Ink - Prima
Punch - Martha Stewart


Enjoy!!

Monday, January 26, 2015

Love is...

Today I have a wonderful layout of love to share with you. For this project, I used three different Unique Laser Designs wood décor pieces. I know this may seem like a bit much, but just stay tuned and you will see how it works out perfectly.


Below are the first two designs I used:


Heart Stencil


Now let's begin with the paper embellishments.  I use stamps to create my own ephemera.  This time I'm using a stamp and spray mist to create more of a splattered background image instead of a crisp background.


I started by spraying the stamp but my mister is a bit clogged, this is where using a paint brush helps.


Use a brayer to gain a flat press on the cardstock and to grip the ink from the stamp.


This is the final result of the background.  Continue to distress the ephemera with stamped script, paint splatters, etc.


Next, let's begin altering the Love Birds using embossing adhesive and a paint brush to get into the smaller areas of the bird branch. After applying the embossing adhesive, liberally add your choice of embossing powder then set.


Paint the birds using Tim Holtz distress paint, after the paint has dried add embossing adhesive and powder for a vintage look.


It's now time to build layers.


After using a stencil and light molding paste to create the first layer, I then used the Heart Stencil to add a layer of hearts.


I used liquid scrap dots to add height to the love birds as well as hold the letters within the birds in place.

The third design I used on this layout is Border Swirl G. I covered the flourish with gesso then distress paint.

Finally, there's the completed layout.


Hearts were randomly used from the Heart Stencil.


Up close view of the reverse stamped misted hearts.


Ingredients:
Pattern Paper - Fancy Pants Designs, Crate Paper, Handmade Ephemera
Inks - Prima Chalk Ink in Teak Wall, Ranger by Wendi Vecchi Archival ink in Watering Can, Heidi Swapp Color Shine in Mustard, Tattered Angels Glimmer Mist in Kraft, Tim Holtz Distress Paint in Antique Linen
Various Stamps
Embossing Powder - Tim Holtz Distress Vintage Photo, Stampin' Emboss Scented Powder (Discontinued)
Other - Tim Holtz Tiny Attacher, Helmar Adhesives

Friday, January 9, 2015

Two Hearts As One

I just "heart" that title. Don't you just feel love in the air? I know it's just January, but I hear the hearts just calling my name. Today I have two projects to share with you to get you in a heartfelt spirit.


 I used cork hearts to embellish both projects. However, I'm going to begin with the layout I created first.


Of course every great project starts with a pile of products to begin the process of layering.


After the base layers have been created then we're off to the good part, adding Unique Laser Designs embellishments.

I used the cork embellishments in it's basic state, but added a bit of silver distress stain to portions so that it tie into the other colors used (also for added texture).

Continue to add ink, flowers and your title.


I had this great idea of using the Circle Stencil and cutting only two of the circles to create the look of wedding rings.
 
 
After cutting the individual rings, I covered each of them with Tim Holtz silver distress stain.


After the circles were dry, I adhered them to the page and added a tear drop pearl to one ring.
 
Next, I created a masculine valentine card.  

 
We all know men actually love receiving Valentine gifts as well.


For this card I used the same embellIshments as on the layout, but I also used this set of Keys.

 
To distress the key I used a bit of blue color mist and topped it with a splash of silver distress stain, which gave it a rustic look.
 
 
I love this view of the mixed textures, cork, wood, chipboard and grunge paper mixed together.


Wednesday, January 7, 2015

Frosty Snowflakes

This is a picture of my friend's daughter at her first winter in the snow skiing.  She loved skiing and being the in the snow, but hated getting all bundled up and the first thing she did when she got back to the house was to take snow gear off.


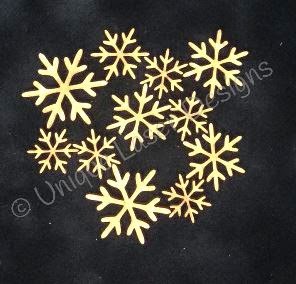
I created this page using the wonderful  ULD snowflakes.


http://www.uniquelaserdesigns.com/#!christmas/cbte

I started out painting all the chipboard snowflakes from ULD in white acrylic paint, the ones that were clear or already a white plastic I left alone.  I then let the paint dry.


I then took some of the painted snowflakes and added in some mica powder in white or a blend of white, brown, and blue to create a blue to match the papers.  I used a dry paint brush to apply the powder to the snowflakes that were pressed into Ranger perfect medium to the powder would stick to the snowflake.  This gave them a nice shimmer and shine.


For some of the other snowflakes including the white plastic ones I used some sparkle medium.  I just used my finger to dab a bit of the glitter medium to the snowflakes in the various color to make then all pretty and sparkly!


Time to get out those snow pictures, dusty them off, and make some beautiful snowy pages!!
 
Supplies Used
Cardstock - The Robin's Nest
Pattern Paper - The Robin's Nest
Vellum - The Robin's Nest
Glitter Cardstock - The Robin's Nest
Dew Drops  - The Robin's Nest
Flowers - Recollections
Glitter & Mica Medium - Imagination Crafts
Chipboard & MDF - ULD
Paint - Plaid
Adhesive - Tombow
Medium - Ranger
Beads - Recollections
Pen - Sharpie
Trimmer - Fiskars
Enjoy!
http://scraps-of-reflections.blogspot.com/