Showing posts with label Martha Lucia Gómez. Show all posts

Tuesday, April 21, 2015

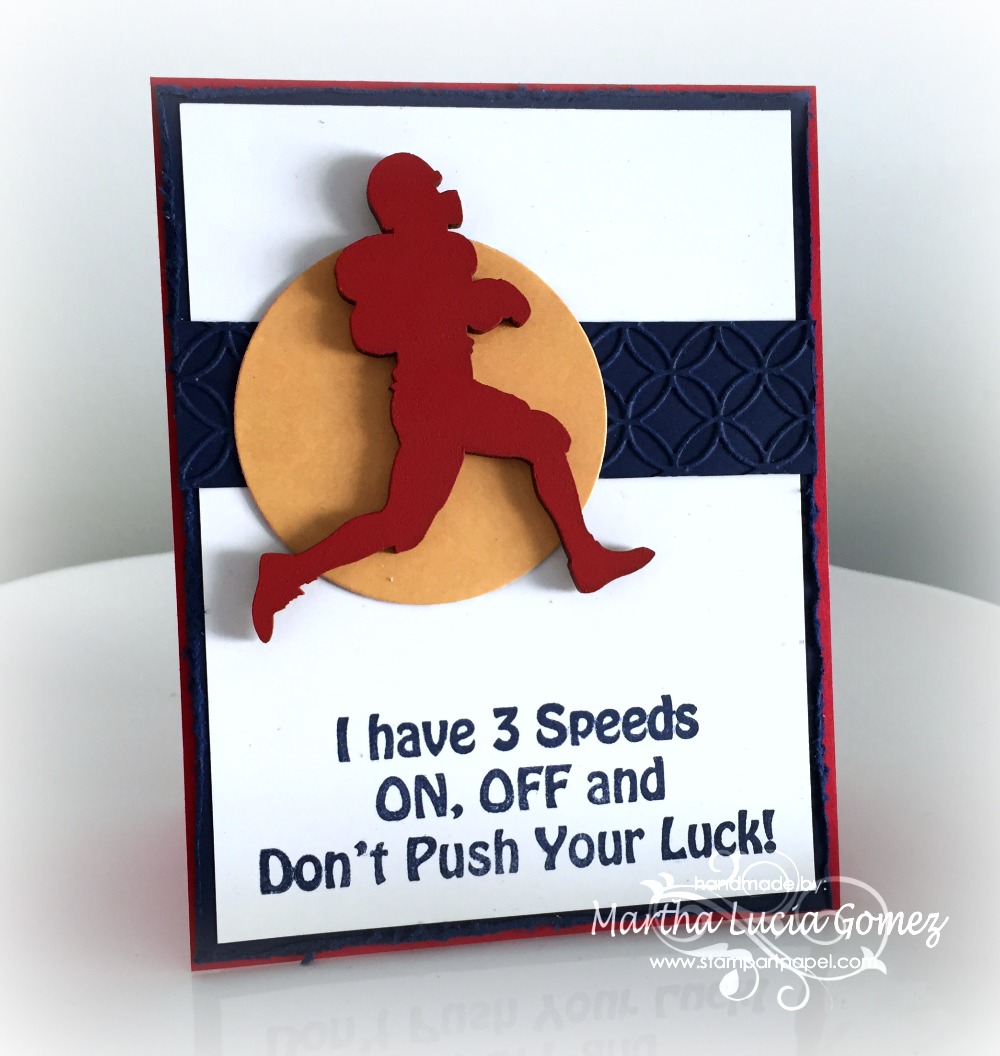
FOOTBALL PLAYER CARD

Hi everyone, Martha Lucia here with a "Football Player Card" to share with you. It's not common for me make masculine  cards but, I received this wonderful laser cut and I decided to use it immediately.

DON'T PUSH YOUR LUCK


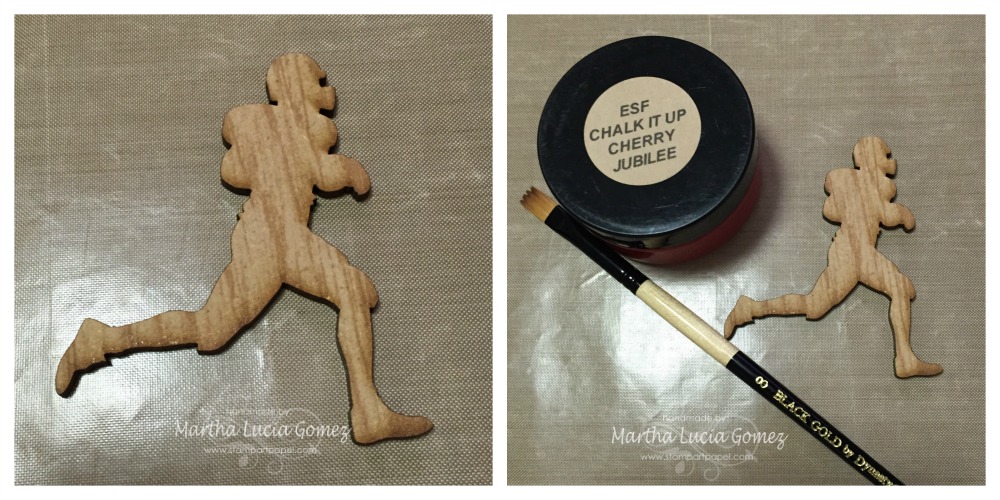
To create this project I am using a Football Player Laser Cut available in our store. It comes in natural wood, chipboard and cork.  I used the wood version and I decided to give it color using ESF Chalk It Up Cherry Jubilee.
DON'T PUSH YOUR LUCK  

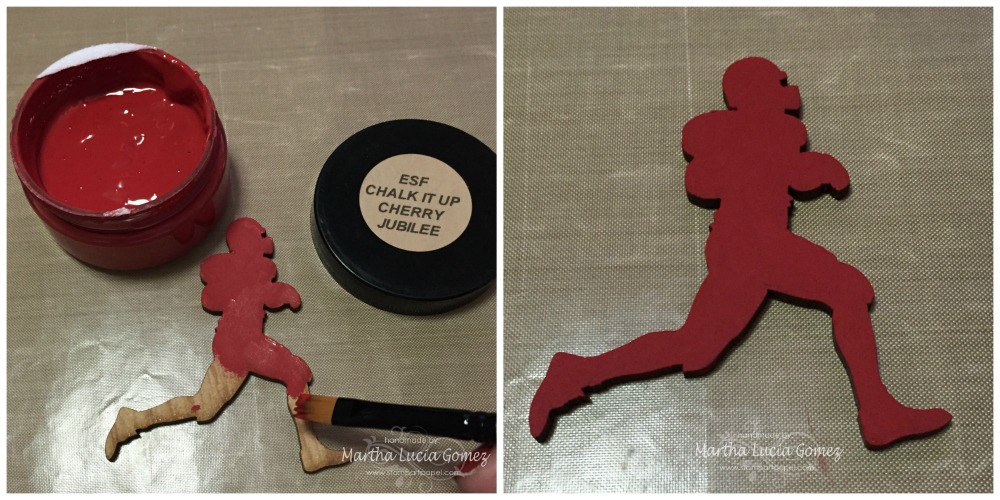
I applied the ESF Chalk It Up with a Black Gold by Dynasty paint brush and let it dry for a few minutes.
DON'T PUSH YOUR LUCK

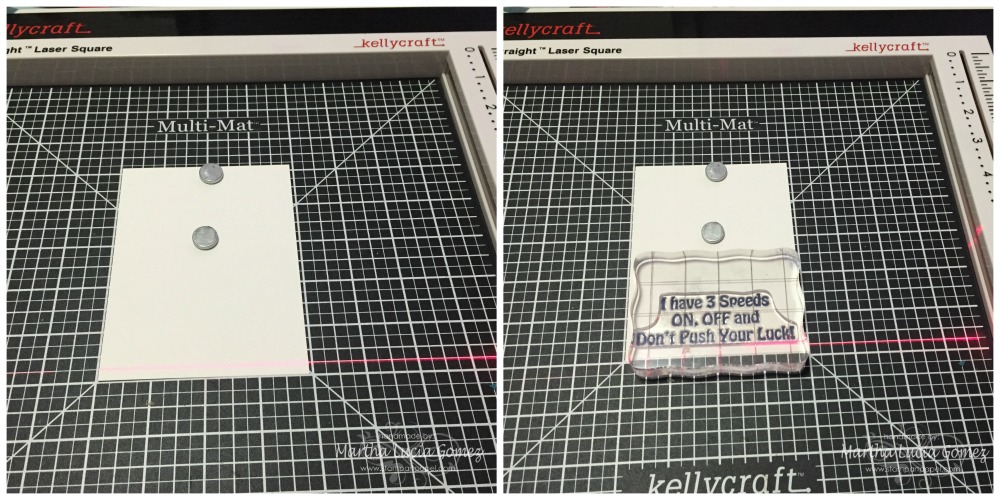
After this, I cut the base of my card using Real Red card stock. The size of the card is a regular size 5-1/2"x4-1/4". I also cut the second and third layers. The second layer is Night of Navy and the size is 5-3/8"x4-1/8" because I created a distress border over this. The third layer is 5-1/8"x3-7/8". 4. I decided to stamp the sentiment first, using my Get-it-Straight™ Laser Square. This helped me to align all my stamps. 
  DON'T PUSH YOUR LUCK

Then, I aligned the three layers and pasted these using snail adhesive and pasted the special details. I embossed a piece of card stock with a Circle Interlock Embossing Folder and pasted this over the white layer. I cut a circle with a framelit and pasted it with snail adhesive too. I finally pasted my principal embellishment: the painted football player.


I always use my Get-it-Straight™ Laser Square to align the layers, the embellishments and all the pieces that I use in my creations.

MATERIALS:
  • Football Player Unique Laser Designs 
  • KellyCraft™  Get-it-Straight™ Laser Square
  • KellyCraft™  Multi-Mat™
  • Jimbo Lojik™ Stamp Set J
  • ESF Chalk It Up Cherry Jubilee
  • Card stock Whisper White, Night of Navy and Real Red (Stampin Up)
  • Big Shot (Sizzix)
  • Circle Interlock Darice Embossing Folder
  • Circle Framelits Collections
  • Distress Tool
  • Nigth of Navy Classic Ink
  • Snail Adhesive
I hope my project inspired you. Remember to visit our store. I am sure you will find great laser cuts that you will love. Come back soon for more ideas!

Martha Lucia

Thursday, March 26, 2015

DAISIES FOR MY FRAME

Hi friends, here Martha Lucia with my most recently creation using Daisies from Unique Laser Designs Store. We are officially in Spring and as you can note I love frames, so now it is time to create one for this season.


In this opportunity I am using a silver frame from IKEA, they are very cheap and you can change your layout very frequently. This silver color is sophisticated and looks perfect with these laser cut: The Daisies!!!


I gave color to the Daisies using watercolor paint. I mixed white, yellow and dark orange.


I started with the a solid color and then changed my mind to mix all the colors. I used an acrylic block to mix the paints and water.


Here you can see the color transformation or combination. You choose.


I let my daisies dry completely and in a while i cut a basic gray cardstock to put inside of my frame. I cut and layer my photo to paste over this layer. For me it is easier to decorate my frames when the layers are placed within the framework.


I aligned all the elements and pasted the daisies flowers using a liquid glue. After this I pasted a black stone on the center of each flower and on top of the central banner. As a final touch I gave it a little bling using my brush of Wing of Stella Clear over some petals and stamped a sentiment to put vertical over the right side.


Materials:


I hope you like this frame, visit us in Unique Laser Design Store and choose your embellishments to create your own frame using different techniques and products. Here in our blog you always will find great inspiration.

See you soon with other idea to make together!

Martha Lucia

Thursday, March 19, 2015

EASTER CARDS

Hi everyone, Martha Lucia here with two Easter cards to share with you. I am using the Easter Eggs to create my cards and of course pastel colors and a few sweet elements that I will show you. Here is my first card:


To make this card I am using the Easter Eggs that come in a package with different designs. This product is available in two sizes and two materials, wood and chipboard. I used the smail size, 1"x1-1/2".


In this opportunity I decided to coloring my pieces with Yasutomo Pearlescent Watercolor Set. I gave a different color to each easter egg.


I painted each egg with a paint brush using the watercolor technique and several coats of pearlescent to accent the color.


After I finalized with my easter eggs, I cut the card base using a piece of Crumb Cake cardstock of 6"x12", a piece of Blushing Bride of 5-3/4"x5-3/4" and a whisper white piece of 5-5/8"x5-5/8" to create the layers.


To decorate the third layer I used a stencil with big dots and blushing bride classic Ink with a sponge.


After this, I cut two pieces of grass using my cricut explore and a photo frame using the On Film framelits.


Now I had all the pieces to put together my first card so I started to assemble the second and third layer, tied two loops of baker twine and pasted the frame and grass over them 


After this, I pasted my easter eggs with a liquid glue and decorated with some paper flowers and stamped my sentiment.


As you will see, I didn't use all the eggs that I colored. So here is the last one in my second card. A clear and simple model that I created using the scraps of my fist card. 


To create this card, I just stamped a border image several times on the bottom part using a Cherry Blossom PowderPuff Chalk Ink. Then I pasted my Easter Egg on top using a liquid glue.


To finalize the decoration I cut a whisper white piece of card stock, I created a border over it using a Edgelits  and stamped my message with Melon Mambo Classic Ink. And I pasted a button on the left side with a bow of bakers twine and a little piece of grass over my Easter Egg.


Materials:

I hope you like these ideas, with these Easter eggs you can create whatever you want, using different techniques ideas.

See you soon with other idea to make together!

Martha Lucia

Thursday, March 5, 2015

IRISH COFFEE FOR SOMEONE?

Hi friends, Martha Lucia here with an irish coffee to share with you! Have you see this beautiful clovers and swirls in the Unique Laser Store? I have to tell you that as a Colombian girl, we don't celebrate St. Patrick's but here in the US I saw a lot of ideas that inspired me to create something beautiful for you, so I decided to combine a few cultures in my creation.


I created a frame with a big size, 8"x10". This is perfect to use in our office or kitchen, near to the coffee maker. With this in mind I changed the traditional phrase Kiss Me, I'm Irish with Drink Me, I'm Irish.


These were my main materials, all from our Store. I used a different pieces. The top clover is a beautiful piece of 1"x1" that come in a package of ten and is called Clovers. The little square is a scrap piece from Kennyscrap and the large clover is a Special Order Item from Unique Laser Designs.  

I painted them with Watercolor Green the clovers and the swirls with Yellow Paint, letting them dry for a few minutes.


Then using a Thinlits Little Letters and the big shot , I cut all my letters using the same colors. I pasted the green letter over the yellow a little bit moved to the right to give dimension to each one.


To compliment the decoration of my frame, I stamped a coffee cup with classic Ink Early Espresso over Very Vanilla Cardstock using the stamp set Perfect Blend from Stampin Up. After the image was stamped, I cut it with scissors.


After this, using my Get-It-Straight Laser Square from KellyCraft I aligned all the letters and embellishments over the paper base and pasted them one by one using a liquid glue. I started with the letters and and then with the embellishments.


Here some details of my laser cuts:


Materials:
See you very soon with another Unique idea. Enjoy your Irish Coffee!

Thursday, February 26, 2015

LOVE BIRDS IN A BRANCH CARD

Hi everyone, Martha Lucia here with another fun card to share with you. In February love is in the air, and I found that these Love Birds are perfect for this fact.


To make my card I am using "only" one piece from Unique Laser Designs, I said only because I want to have everything. This is a gorgeous cut called Love Birds, available in wood and chipboard. I used the chipboard presentation.


I decided to give each bird different colors using chalk ink in soft colors. I used the New Collection of PowderPuff Chalk Ink of Quick Quotes in the colors Peach Tree, Latte, Antique Linen and Cherry Blossom from right to the left. For the branch I used two different tones of green Faber Castell PITT Artistic Pen big brushes.


Note that I applied the chalk ink directly to the each bird and I masked each color to avoid any mixing. For the bird beak and eye I used a Crumb Cake Marker, just to intensify the color.


With the same marker I colored the letters that come inside of the Love Birds to made the Kraft color more intensive.

Now that my central piece was finalized, I cut two different borders in Whisper White cardstock using a Leafy Border from Memory Box and Foliage Border from Darice, to use them on the bottom of my card. And for the body of the card I used  a plain cardstock for the base, a designer series paper for the second layer and a third layer of vellum to made the colors of the designer paper more soft.


I assembled all the pieces with snail adhesive and glue dots and finally pasted on top the Love Birds with dimensionals.


To make my card a little more delicate I pasted a few lilac pearls in the center of the flowers of the Designer Series Paper.

Materials:

  • Love Birds - Unique Laser Designs
  • 2015 PowderPuff Chalk Ink - Quick Quotes
  • Faber Castell PITT Artistic Pen
  • Leafy Border - Memory Box
  • Foliage Border - Darice
  • BigShot
  • Cardstock
  • Designer Series Paper
  • Vellum
  • Pearls
  • Snail Adhesive and Dimensional

I hope you like this idea, because working with these laser cuts is very fun and you can create whatever you want, using different techniques and process or simply leaving the cuts in their natural stage.

See you soon with other idea to make together!

Martha Lucia

Monday, February 16, 2015

A FEATHER PIN

Hi friends, Martha Lucia here with a Feather Pin for you. For today I want to create something different and this time my imagination give me a Pin.


Don´t think that this is a card. My pin is attached to the card but before I explain all the details let me show you how beautiful the designs of all the Feathers are that you can find in Unique Laser Designs Store. They come in a package of 6, 2 of each model and in two different sizes, 2" and 4".


I started my project using the Feathers in MDF version. They are available in MDF, chipboard and cork. My first step was to apply GooseBumps directly over the feather and let it dry for a few minutes to give it a little more texture. On the third photo you will note the difference between a natural feather (left side) and the feather with the GooseBumps.


I started to give it color using four different colors of Gelatos. I began with the soft to dark color and I applied the color with my finger tips. I used the brush paint only to clean the spaces inside the feather.


Now you will see how looks my feather after I all the color was applied and how the GooseBumps gave to it a little texture.


To create the base of my pin I used a canvas fabric that I cut with a Circle Die and decorated with some Sequins, Tulle Ribbon and Thick Backer´s Twine. I attached my feather to this using silicone. And behind it all I put a  little clothespin. 


To finalize my idea, I created a base card to attach my pin and present it to you.


Materials:


See you the next week with another unique idea because with the products of Unique Laser Designs the ordinary becomes extraordinary.