Showing posts with label hot air balloon. Show all posts

Wednesday, August 6, 2014

New Product Announcement


"I love your designs....but wood is too thick..."      
 "Your embellishments are amazing, but I've never tried using wood..."    
"I'm just not sure I'd know how to use MDF..."
"I couldn't use wood on a card !"


These are some of the comments we frequently hear from people who see our products. 

In an attempt to help solve this conundrum, we chose to work with a group of talented designers, and nearly daily, projects are posted to help inspire you with all sorts of different ways that ULD products can be used...on just about every type of surface and in just about any way you could imagine...projects to show you that MDF isn't something to shy away from, but rather something so embrace !

Change can be scary, the thought of trying new things can seem daunting, stepping out of your comfort zone is overwhelming...  
So...in an attempt to give everyone the opportunity to have access to our amazing designs, and possibly "test the waters" and maybe try their hand at wood...we've decided to produce our designs in a more well known material that you'll be familiar with
...CHIPBOARD !
A tiny selection of whats available in chipboard
Due to the nature of some of our designs, not everything will be able to be cut from chipboard, but there is an enormous selection still to choose from.  
As a way to try and slowly show you that you can do the same things (often times with more successful results) by using MDF in your projects...I'll add a little special something to each chipboard order. ;)   I ask that you keep an open mind and use it.  I'm sure you'll soon realize that it is much better than you anticipated it would be !  :) 

Here are a few projects using our MDF products in places some wouldn't consider doing so.
Home Decor Items. Designed by Katy

Banner - Designed by Kisha.
Burlap Canvas.  Designed by Katy
Kids love ULD !  Designed by Samantha
ATC - Designed by Rachelle
Cards !  Designed by Kelly
Mini Album.  Designed by Kimberly
Scrapbook Layout.  Designed by Heidi
Gift Bag.  Designed by Kisha

Wednesday, July 9, 2014

Sky's the Limit

Hello Everybody!

Katy here and using Unique Laser Designs is always so much fun!  I am always so excited to show you my next project.  Without any further ado here it is.  Be sure to scroll down so you can see how all of this came together! :)


This wall hanging came together from just Unique Laser Designs.  
Here's the list: 
Clouds (2)
ATCs (all 4)


This is what it looked like when I planned it out.  My clouds were already painted white from a previous project.  Yay! ;)  


To glue the ATCs I used gloss gel medium.  When this hardens it is strong (or at least from the book ends project it seems so).  Also, I could easily wipe the front of excess glue.  

Here is what it looks like glued together.


Next I painted gesso onto all of the wood pieces except the window.


So about my window...I love this window.  I love that it really looks 3-D but it is totally flat.  It has lined-details in the wood to add interest, and I don't want to paint over that.  So I put some Tim Holtz walnut stain on it.  On the left side you will see.  I didn't like it.  AT ALL.  LOL.  So to fix it I add Tim's picket fence (white) distress paint.  I put some on my craft mat and dabbed it on with my finger.  This is the right side.  The details are now more visible.  I added another couple of layers of white paint.  It's a little shabby shic.  


For the Hot Air Balloon I painted it with Tim Holtz Distress Mustard Seed (yellow) and did the outlines in Distress Spiced Marmalade.  The basket is painted with walnut stain and crushed olive (on the zigzag).  I used Perfect Pearls perfect gold and water to paint over the whole hot air balloon.  This gives it a nice golden shimmer.


To add texture to the clouds I used Martha Stewart's white texture paste and Tim Holtz's big bubble stencil on the big cloud and T.H. dot fade on the smaller cloud.  The smaller cloud came out a little bit different because I think the paste was really wet.  But I love it!  


For the main board that was created with the ATCs I have a picture as each layer was added.  So get ready!

I dabbed 3 different colors of blue distress paint onto my mat.  Starting with the lightest one I pounced it around using Ranger's sponge applicator.  Then I added the medium blue and then the darker blue.  The colors I used were: salty ocean, broken china, and chipped sapphire.  Once the main colors were there, I filled in and pounced until I was happy with it.


Once dried I stamped the text onto the base with Ranger Archival Ink.  I used the text stamp twice to fill up the base.  As you can see not all of the words came out.  That's ok!  Better actually-it gives it an organic feel.


Next I added a sunshine at the top using mustard seed distress paint.  If you use paint on your stamps-stamp and then quickly go wash it off.  You don't want the paint to dry to the stamp.

Also, on this picture I added grass at the bottom.  I used Twinkling H2Os Emerald and T.H. Stripes stencil.  Then I filled in some green at the bottom.


I added stars in the middle.  But I used a transparent embossing paste with T.H. stars stencil.


Then I saw this stamp sitting on my desk.  I love this delicate little stamp!  I colored it with the distress markers.  And you can see them amongst the "weeds."  


So now it is time to put the elements on.  Yay!  I used glossy accents to adhere the clouds.  I used pop dots to support the balloon and glossy accents where it touched the clouds.


I printed out my picture and glued it into the frame using glossy accents.  I trimmed off the over hang.


These are Alpha Tiles by Tim Holtz.  You can see the delicate flowers in the background.


Here is on last picture.  Remember the stars?


To hang this I hot glued 2 soda tabs to the back.  And this is a fancy yarn from my stash that I knotted a couple of times on each side.


Thank you for stopping by today!  Check us out on Pinterest and Facebook as well!


Supply List:  Unique Wood Designs Pieces, gloss gel medium (or preferred adhesive, gesso, Tim Holtz Distress Paints: picket fence, spiced marmalade, mustard seed, salty ocean, broken china, chipped sapphire, crushed olive, walnut stain, Twinkling H2O's Emerald, Perfect Pearls Perfect Gold, Martha Stewart White Texture, Tim Holtz Stencils: stars, bubble, dot fade, stripes, Ranger sponge applicator, Ranger Black Archival Ink, Rubbernecker Best of Times Stamp, Tim Holtz mini grunge Sunshine stamp, Great Impressions Wild Flowers, Wendy Vecchi Transparent Embossing Paste, Distress Markers peeled paint and barn door, Glossy Accents, pop dots, Tim Holtz Alpha Tiles

Friday, June 27, 2014

Up, Up, & Be Happy!!!!

Hi there crafters!
Rachelle here sharing my latest project using


I went with a card.
"Be Happy"

Started off by simply painting each cut out,
then applying gloss varnish to make them really stand out.

 Next, after the cut outs dried I began creating the
card using white cardstock.
I used a edge punch and added a thin piece
of Echo Park The Record2 cardstock. I then added
more die cut clouds and light blue ink for
a sky effect.

 Finally I added the "be happy" stamp and a few
embellishments.
All done!!! 

I hope you have be inspired to create something special
using wood cut outs from
You will be glad you did.

Thanks for stopping by today!
See Ya Soon!


Thursday, June 26, 2014

Believe in Yourself Canvas

Hello ULD fans, Michelle here with a fun uplifting wall canvas featuring some great laser cut pieces from Unique Laser Designs.


This piece features the hot air balloon, clouds and the cutout Believe in Yourself.


I used my prisma colored pencils to color all the ULD pieces.  Here's a close up of one of the clouds.


I love this hot air balloon, so many options for how you could use this.


And this turned out a bit more patriotic than I planned but it is almost the forth of July!  Again I used colored pencils to color this piece.


Hope you have a bright day.

Thanks for looking!


Wednesday, June 11, 2014

Wall Decor Using ULD embellishments & Glitter!

Hello,

Kimberly here sharing some of my wall decor projects I made for my studio, using some ULD embellishments and glitter!

I started with 3 glass empty frames that I had already hanging in my craft room. I usually fill the frames w/ letters to spell something, or I tape favorite embellishments to the inside just for fun.  But once I was introduced to the ULD embellishments, I knew what my next plan was.

I loved the bike, feathers, and hot air balloon.  All I did was add glitter card stock to one side of the frame and add the embellishments to the outside of the frame.  It gives it the 3D look. 

Here is a look at the wall where you can see the 3 small frames hanging up and you can see the feather in the top frame, then the hot air balloon, and then the bike.  I have close up photos below. 


This is my painting, glitter, messing work area.. near the sink for easy clean up.


Thanks for taking a look at 3 easy ways to add simple wall décor to any room.  Just add glitter and some of your favorite Unique Laser Design images.


Thursday, June 5, 2014

Mini Embellishments

Hello, Kimberly here with a few mini embellishments.

I love creating mini albums!  I also love mini versions of my favorite Wood Embellishments from Unique Laser Designs.  Did you know that most of their designs come in two sizes?  Yep.. perfect for my mini albums. 

Here are just a few mini albums and a few examples of where the mini embellishments came in handy.  I did use a few of the regular size embellishments.. so they are not all mini's.

4 recent mini albums where I added ULD embellishments.

See the golden bee sticking out behind the flower.

Hot Air Balloons.. not a mini but one of my favorite.

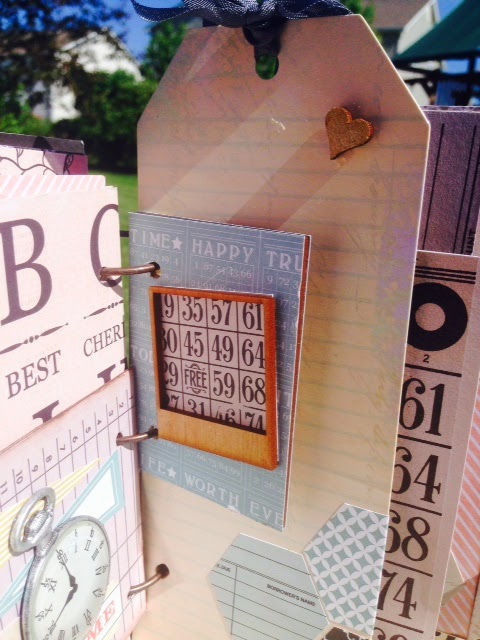
Mini feather fit perfect on a mini tag.

An ATC from ULD was covered then I added a
mini Polaroid. See the mini heart on the tag?

another mini Polaroid frame waiting for a picture

another feather and heart

love the mini scissors

Check out the page on the website featuring the MINI's.. I am sure you will find several that you want to add to your collection.  Mini's are perfect plain, painted, stamped on, colored, etc.. they are also perfect for any of your craft projects.  Check out more of this blog to find more creative ideas from other designers.  Have a great day!  Kimberly