Showing posts with label paint. Show all posts

Tuesday, April 21, 2015

FOOTBALL PLAYER CARD

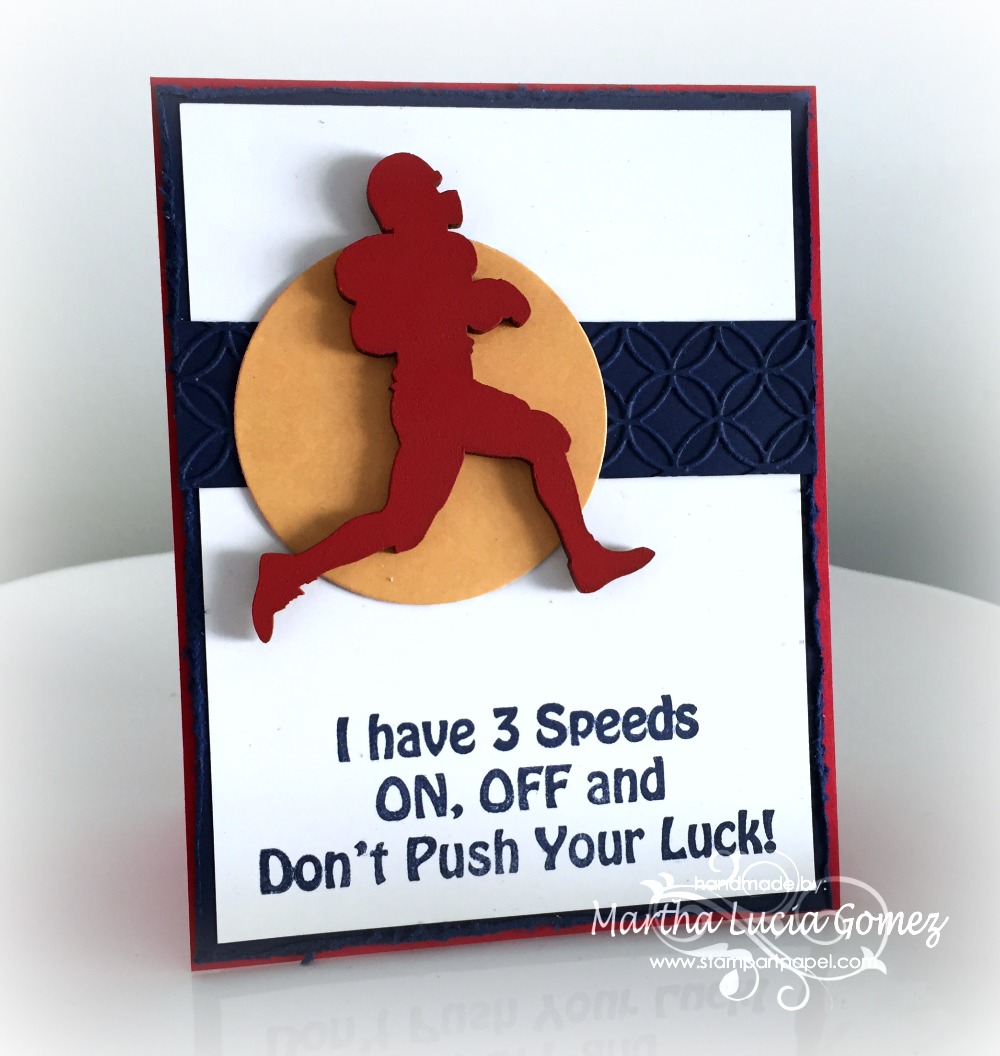
Hi everyone, Martha Lucia here with a "Football Player Card" to share with you. It's not common for me make masculine  cards but, I received this wonderful laser cut and I decided to use it immediately.

DON'T PUSH YOUR LUCK


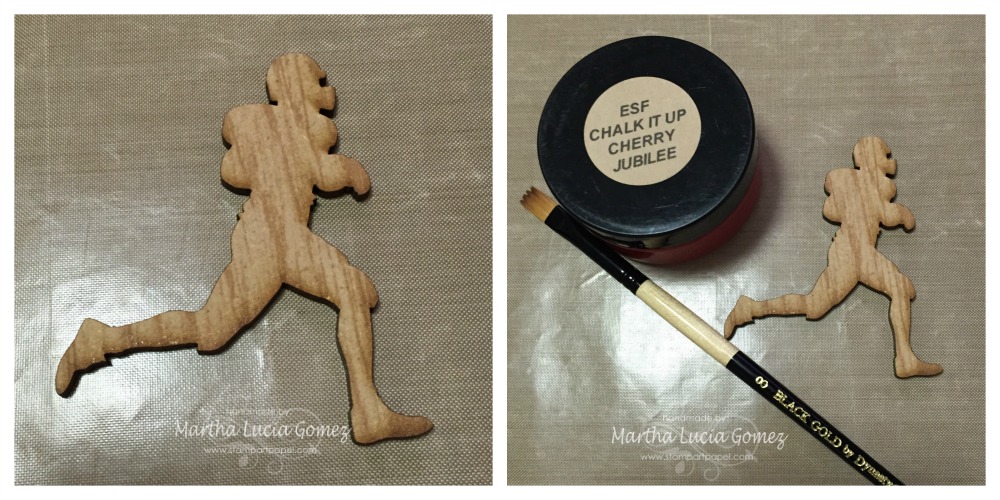
To create this project I am using a Football Player Laser Cut available in our store. It comes in natural wood, chipboard and cork.  I used the wood version and I decided to give it color using ESF Chalk It Up Cherry Jubilee.
DON'T PUSH YOUR LUCK  

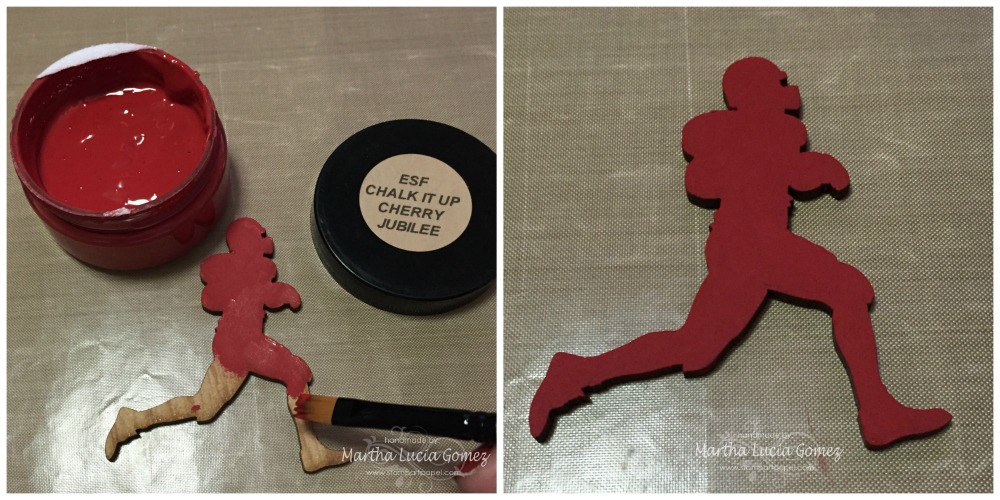
I applied the ESF Chalk It Up with a Black Gold by Dynasty paint brush and let it dry for a few minutes.
DON'T PUSH YOUR LUCK

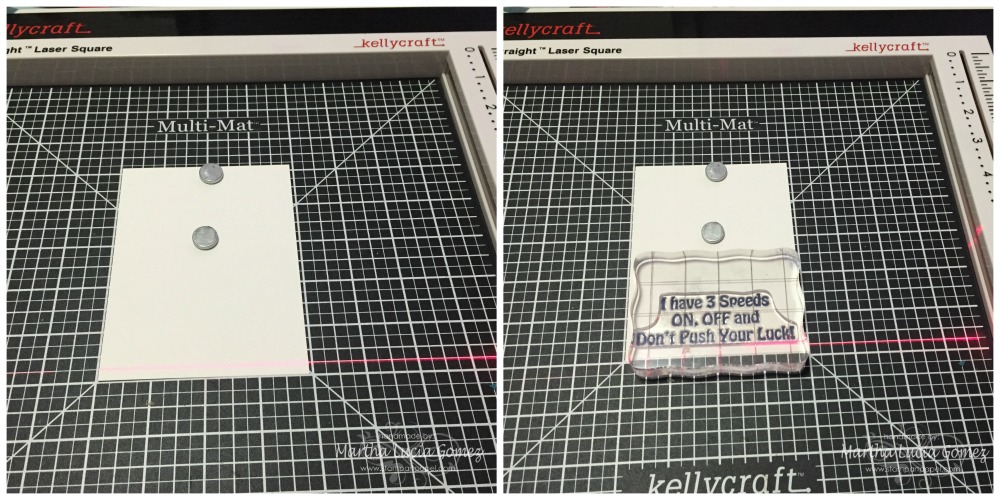
After this, I cut the base of my card using Real Red card stock. The size of the card is a regular size 5-1/2"x4-1/4". I also cut the second and third layers. The second layer is Night of Navy and the size is 5-3/8"x4-1/8" because I created a distress border over this. The third layer is 5-1/8"x3-7/8". 4. I decided to stamp the sentiment first, using my Get-it-Straight™ Laser Square. This helped me to align all my stamps. 
  DON'T PUSH YOUR LUCK

Then, I aligned the three layers and pasted these using snail adhesive and pasted the special details. I embossed a piece of card stock with a Circle Interlock Embossing Folder and pasted this over the white layer. I cut a circle with a framelit and pasted it with snail adhesive too. I finally pasted my principal embellishment: the painted football player.


I always use my Get-it-Straight™ Laser Square to align the layers, the embellishments and all the pieces that I use in my creations.

MATERIALS:
  • Football Player Unique Laser Designs 
  • KellyCraft™  Get-it-Straight™ Laser Square
  • KellyCraft™  Multi-Mat™
  • Jimbo Lojik™ Stamp Set J
  • ESF Chalk It Up Cherry Jubilee
  • Card stock Whisper White, Night of Navy and Real Red (Stampin Up)
  • Big Shot (Sizzix)
  • Circle Interlock Darice Embossing Folder
  • Circle Framelits Collections
  • Distress Tool
  • Nigth of Navy Classic Ink
  • Snail Adhesive
I hope my project inspired you. Remember to visit our store. I am sure you will find great laser cuts that you will love. Come back soon for more ideas!

Martha Lucia

Wednesday, December 17, 2014

Must Be Santa


It isn't Christmas without Santa!!!  This design uses Distressed inks/stains, wax, Promarkers, and Gel Pens.


Poinsettia is a special cut I designed.  There are a couple more sizes so you could add more petals to make the poinsettia bigger if designing on a bigger surface.  The inserts are cool as the Star of Bethlehem!


Distressed inked center of Santa Bingo Card in yellow hue.


Also Distressed with Tea Dye and edged card with Vintage stain.


Pounced a pink hue of Adirondack Dabber paints to lighten up the card.


Gelly pen used on eyes, hat design and other areas.


Painted Santa's beard white.


Promarker for Poinsettia, and face.  Used a darker hue for bottom petals.


Base coated little poinsettia petals in white then added Promarker in lighter hue.


Added Prills for center of poinsettia.


Used wax for outline areas of beard to make it raised.  Also did puddles of wax on hat for that fluffy look!  I sprinkled "Crystal Accents," (a very very fine mica glitter) to make the hat sparkle.


C
Crystal Accents added to snowflake and hat .


Close up of Santa!


With this holiday season, I would like to thank Unique Laser Designs for the opportunity to design with their fabulous woodcuts.  Also for using my wood pattern designs on some of the cuts!  The design team is very talented and I am blessed to be a member designing along side these creative teammates.


May your holidays be bright and filled with art supplies!!!!


Cre8tivelea Yours - Lea


Thursday, August 28, 2014

Changing Sea-sons


                                              Do Not Throw Away Any Wood Scraps!

Scraps to treasure, I say.  Okay, so I am a scraps hoarder!  Well, paper and wood.  When I receive my orders from ULD, sometimes I have little extra pieces of wood from the item and I save them in one of the zip bags I've received.

Some of the scraps have water shapes, other like above; is the inside of the starfish!  I painted that little inside and dotted with fine line black liner marker.  It looks like a starfish too.

Here is the wood I used:


The "Brick Wall Stencil," one of the word squares that comes with is used, and the star fish is the insert of the star fish.


The seaweed is scraps from orders put together.


My last post, I showed encaustics (hot wax) on wood.  Here is a scrap of wax works that I mounted a few times.  This will serve as the ocean floor with the light of the sun shinning in.


Not as visible in this photo, but I painted the seahorse, added accents with a Gelly Roll pen (added color and blended with finger before it dries), and added dots with a stamp and ink pad.


The bubbles are achieved by using white pigment ink first.  I could of pained with Gesso, but it was easier to just use the ink and then paint over.


Little dashes of white over the orange bubbles make them look more dimensional.


The starfish and seaweed are laid out where I want to put them.  Both are painted, and as I mentioned above, the starfish when finished will have the little black dots.  The fish is painted with a medium orange and darker permanent dye orange ink tapped on top.


Here is a close up of the details.  I also splattered yellow paint lightly around the area.


To finish the art, I used a scrap of Bo Bunny paper.  The hook is added using a bit of glitter Gelly Roll pen to color and an arrow added.  It is painted in 2 shades of green.

I used the word "Joy" from the Brick Wall Stencil.  It is edged in yellow.

In St. Louis, MO., the weather will be warm and humid for a few months, but for most; the seasons are going to change from summer to fall.  There still is time to get out there and do some fishing!

Look at things in a different way.  For scrappers, a photo could be put in to replace the wax background and do the same treatment.  Create mixing and matching your wood pieces.  The octopus or dolphin could be designed in the art instead of he fish.  Your choices are unlimited!!!

Cre8tivelea Yours - Lea


Tuesday, July 29, 2014

Forest Fairy Wonderland


Lea, here; a new design team member!  Today I want to share a layout using :

                                                            Young Fairy:  Pixie
                                                            Leaves:  Small


Soft painting and collage gives this scene a magical look.  Bo Bunny paper was used, cutting parts to collage for further expression and feeling of the theme.

The paper was enhanced with painting - watercolor to the tree, and acrylic pattern in the background.


 First, I placed pieces for layout and collage to get a sense of how I want my art to look.  I decided not to use the top paper strip.  I had painted the tree and accented the background with liquid acrylic paint.


I just ADORE ULD WOOD!  I know many people comment on the smell, which I love too.  The wood is premium, no sanding needed, and the texture/coloring is beautiful.

Dry brushing a small amount of Gesso (base coat used to save money on expensive paints) on areas. I am using liquid acrylic paints.  I do not want much of the texture and want the colors to be true so the Gesso helps.  I left the skin natural to keep the texture.


A light touch painting the little fairy, almost transparent but not quite.  Simple shading and a tiny bit of dry brushing with white.  I usually do not use black for shading and in some art, I do use a little white as an extra pop of highlighting.


On the close up of the face, you can see the simple shading and the white added for highlights.  Glitter added on wings.


Here the leaf is painted in a darker green and yellow is used as a highlight.  Layering shades is simple yet effective.


Word "Inspire" is cut on an electronic cutting machine.

I am really excited to be a part of this talented team!!!

Cre8tiveLea Yours -


Sunday, April 27, 2014

Spring Wreath

Hi there!
Rachelle here sharing my most recent project for

Spring is here and it's time to change the wreath hanging
 on your front door.

Let's look at this one!

Spring Burlap Wreath
{The Cross is the wood focal point}


This Cross displays the beginning biblical scenes
which I painted individually.
The top shows Adam & Eve in the Garden of Eden, 
clouds, trees, plants, and animals.


 The center displays the sunshine, water, the earth, moon and stars.

Then we see God holding up the world, moon, and sun.

Next, I started placing the burlap on the wreath. Each piece has a decorative pearl
stick pin and a center burlap with satin ribbon. 
Finally, I placed curl twigs and butterflies on the side for added decor.
The Cross is a beautiful piece from

There we have it
a spring wreath!

That's it for this post.
Thanks for stopping by and remember you can get the Cross
and more from
 See Ya Soon!