Showing posts with label heat embossing. Show all posts

Tuesday, December 2, 2014

Christmas Greetings to Ring In The Holidays

I hope everyone is enjoying the holiday season!  Renee Robbins from Scrap Owl back with you today to share some warm Christmas greetings.  It's exciting to be back here with you and finally reveal the second creation I made using the Unique Laser Designs Snow Globe - Bell die cut.

As you may remember, I shared my snow globe shaker card last month. I started out with a chipboard version of the Unique Laser Designs Snow Globe - Bell.  I cut out the bell and ribbon from the interior of the snow globe in order to use it as the foundation of the shaker.  However, with a design this beautiful, there is no way I was going to let the bell and ribbon go to waste!

Unique Laser Designs Snow Globe Bell Chipboard Die Cut

I know what you're thinking.  "How could she cut it apart?!?"  Yes, I know.  This piece is beautiful as one complete image, but sometimes you need to think outside the box - or in this case, snow globe.  There are so many different ways to use these incredible designs and I love being able to come up with something new.

Scrap Owl Renee Robbins Unique Laser Designs Snow Globe Bell Christmas Card

So, here's what I did with the ribbon and bell.  Does it measure up to your expectations?  Have I earned back your trust after cutting the design apart?  I sure hope so!! This clean and elegant Christmas card will be going to my Grandmother who I know will love it.

Scrap Owl Unique Laser Designs Snow Globe Bell Close Up Christmas Card


I used Ranger Gold Alcohol Ink to color the bell.  Those alcohol inks just add the perfect amount of shine to the Unique Laser Designs chipboard.  I then used my Imagine Crafts Lady Bug Memento Marker to shade in the ribbon.  I layered the ink from the marker until I got just the look I was searching for, and then applied a sprinkling of sparkle embossing powder.

Let me know what you think of the card and my choice to cut the bell and ribbon out from the snow globe.  Do you think that the two cards justify the alteration?  Either way, my hope is that these cards get you thinking about how you could use these amazing designs on your next project!

Stay Scrappy My Friends!


Thursday, November 27, 2014

My Special Bag for Holidays

Hi everyone,

Martha Lucia here! This time of the year is absolutely my favorite; gathering with friends and family, decorating, celebrating the reason for the season and creating a lot of special gifts. Today I want to share My Special Bag for the Holidays.


One of my favorite things about the holidays is the opportunity to give the gifts and pack them. But during the last few years I have discovered more and more that gift cards and money seem to be a crowd favorite. It simplifies things, but sometimes money and gift cards don't feel very personal. So this year I decided to create special bags because the packaging becomes even more important, so as to make the gift feel more meaningful.

I think I chose the perfect product in the Unique Laser Designs Store. This is the Holly Ornament that I will show you today. This is a unique piece available in unfinished wood, great to decorate and personalize. I made mine using Versamark ink and different colors of embossing powders: Cherry Cobbler, Wild Wasabi, Early Espresso and Gold from Stampin Up.  I then created a little texture over the leaves with Gelatos in yellow, brown and dark green from Faber castell.


The bag is a Mini Muslin Bag from Stampin Up that came in a plain ivory color and I decided to decorate with Encore Gold Metalic Ink and a sponge dauber. To avoid mixing the ink in both sides of the bag I put a piece of cardboard covered with wax paper inside of the bag.

The final touch was a cherry cobbler bow with a line of gold sequins to tie a small tag with best wishes stamped. The holly ornament came with a ribbon to hang it easily on the tree. 


Now I want to show you the original form of my holly ornament and invite you to visit the ULD Store to see all of different ornaments that are available during this holiday season. 


Products Used:


  • Holly Ornament - UNIQUE LASER DESIGNS
  • Versamark Ink
  • Embossing Powder in Cherry Cobbler, Wild Wasabi, Gold and Early Espresso (Stampin Up)
  • Encore Gold Metalic Ink (Stampin Up)
  • Sponge Dauber
  • Muslin Bag
  • Sequins
  • Ribbon
  • That´s the ticket Stamp Set or Ese es el Boleto Set de Sellos (Stampin Up)

 Come back soon to see more wonderful ideas!

{{HUGS}} Martha Lucia!

Monday, November 17, 2014

Winter Getting You Down? Shake It Off!

Brrrrr!  Hello everyone, it's Renee from Scrap Owl back with today's creation inspiration!

The snow is starting to stick on the ground and I'm none too happy about it. See, even living in northern Illinois I can admit that winter is not something I look forward to.  Yes, we have snowmobiling, and sled mountains, and ice skating, but we also have cold.  Bone chilling cold. Why can't we have all the fun and none of the cold?  Well, my project today, I did just that!


Snow Globe Shaker Card

I created my snow globe shaker card using the the Snow Globe - Bell die cut.  This particular die cut was made from chipboard, but it is also available in the medium density fiberboard (MDF).  I used a tip that I gleaned from Kisha Walton during our Scrap Owl Podcast interview where she told me that you can stretch your Unique Laser Design pieces by cutting them up.  It got me thinking.... "do you wan to build a snow globe?"


By cutting out the bell inside the globe, I now have two pieces that I can use for my cards or layouts.  Additionally, it opened up space to make a shaker card!  If you haven't seen these yet, they are extremely popular right now.  I actually had the chance to talk with Paulina Nakamura from Pretty Pink Posh who, some say, is the mother of the shaker card movement.

I primed the snow globe with some white paint for the globe part and some black paint for the base.  I then went back and added a coat of Imagine Crafts Clear Creative Medium for shine.  On the bottom, I only applied the medium, but on the top I mixed in some subtle sparkle.


To make this shaker card, I stamped a sentiment on top of a piece of vellum and attached that to the underside of the chipboard snow globe.  Then I applied foam tape to the back of the chipboard to make the snow globe pop off the page a bit.  This step is crucial for a shaker card.  You need to give the sequins enough space to wiggle and jiggle.

For this card I used Paulina's Marshmallow sequins.  They have just the right amount of shine to mimic snow.  I flattened them into a small group and then attached the snow globe right on top of them.


For the base of the card, I used the a-side of Merry Christmas from Moxxie's Happy Pawlidays collection. I also stamped some small snowflakes around the snow globe and embossed them with a pearl shine.

I simply love the way this card came out and hope you do, too!  Also, I'm looking forward to sharing with you what I do with the bell that originally came with the snow globe!!  Stay tuned!!

Stay Scrappy My Friends,
Renee

Thursday, July 17, 2014

Tag Fridge Magnet Tutorial

Hi Ladies, I'm back again this week to show you a cute this project I made as a gift for my mother, using these two products from the Shop.

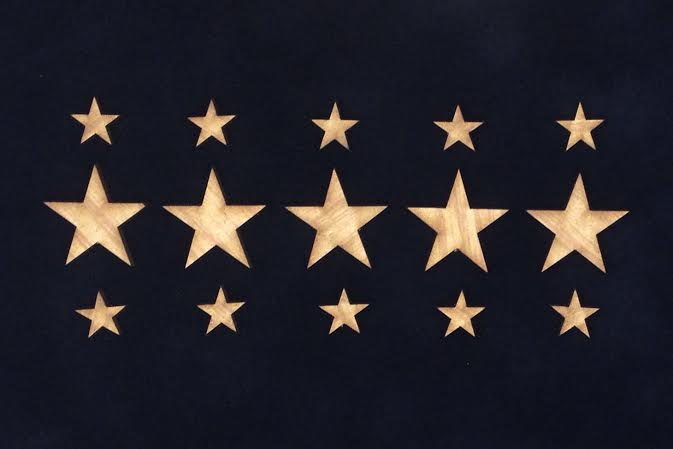
W-2007 Stars (15pc Set; Sm & Lg) (5) 1" x 1"; (10) ½" x ½"
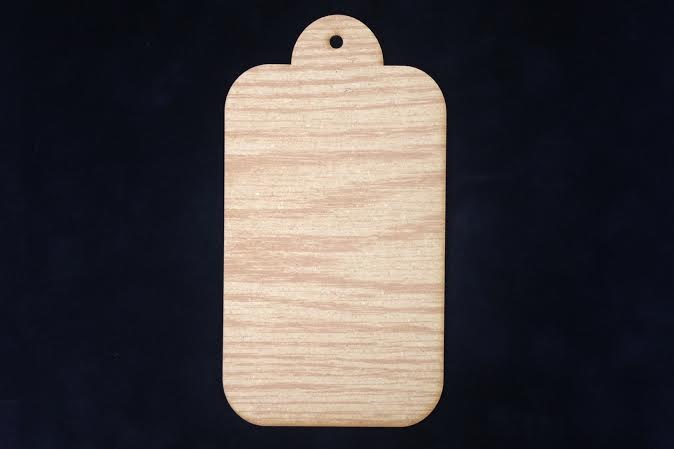
W-1109 Tags (3pc Set) 3½" x 6½"


Firstly you need to prepare your tag, I painted the tag with Orange Marmelade Distress Ink and then applied some gesso on top of it.  The Gesso came out a nice peachy colour.  Let it dry.


Next take take a small of piece of patterned paper and stick it down.  Take you favorite mask or stencil and using some Versamark Watermark Stamp pad go over your stencil.


Now apply some coloured Embossing Powder and heat with a Heat Gun


Apply some smaller strips of patterned paper and adhere you photo, and some extra embellishments.  I have used stars


Once completed take an old fridge magnet and adhere it to the back of the Tag, and voila your Fridge Magnet is completed.  I used a glue gun to stick my magnet down.


And here is my completed Tag Magnet


A very simple inexpensive gift which is extra special.

TFL & Happy Scrapping


Monday, June 9, 2014

Believe In Yourself Canvas

Jamie here with you today with another canvas using Unique Laser Designs embellishments. Ready to find out how I pulled it all together? Well, let's get started.


First off, I painted the entire canvas with brown acrylic paint.


Once the paint was completely dry, I took a page from a dictionary and painted it with pink acrylic paint, then adhered it to the canvas. Next I added an acrylic strip across the dictionary page.


Then, I layered on some lace and flower trim.


Setting the canvas aside for a minute, I started working on the embellishments.  I heat embossed the tree using multiple colors of embossing powder.


Then I layered the heart on the canvas. I also added some flowers on the tree and paint dots around the outer edges of the canvas.


Lastly, I added the sentiment, which was colored with Perfect Pearls.


A very quick canvas with stunning results.

Monday, April 28, 2014

Smile Necklace Holder

Welcome back! Are you read for a beautiful home decor project using Unique Laser Designs products? Well today I have a project using a simple canvas and turned it into a piece that anyone would be proud to display in their home.  This could be used to hold bracelets and necklaces, or keys, or any other lightweight item you can think of.  So let's get going and I'll show you how it was made.


The canvas I used was 8x8 in size and 3in deep.  Simply paint the edges and partway onto the top of the canvas.  I gave it two coats of paint.  


Once the paint is completely dry, adhere your selected patterned paper.


Using a dry brush technique, add more paint around the edges of the patterned paper.  Set aside to let the paint dry.


To add a bit of texture to the background, I adhered some white ribbon.  Since the ribbon is really wide, I simply cut strips through the ribbon to have varying widths.


Now on to the embellishments.  I chose three dress forms, two of which were inked with Distress Ink and the last was heat embossed.


On the two dress forms that were inked, I also added a thin layer of Glass Bead Gel Medium.  Don't worry that it looks milky right now.  Once the gel medium dries, all you will see is clear mini beads which add a wonderful texture.


Now to start putting everything together.  Once the gel medium was dry, I arranged the three dress forms together then added in a few flowers. I also added in a bird, which I left bare except for a spritz of shimmer spray.  Lastly, I added in the sentiment, which I also left bare.  I thought the bare wood was a good color considering all the other bright colors on the canvas.


The last thing to do now is just to screw in seven cup hooks across the bottom of the canvas.


The hardest thing for me now is to figure out if I wan to keep this all for myself or give it as a gift. What do you think?


Saturday, April 26, 2014

MR & MRS

...hey there!!....Debbie with StudioBeeCreations...
here I have my latest canvas using several
pieces.....I am soooooo in love with this awesome product!
GREAT for cardmaking...scrapbooking and MIXED MEDIA canvases!
I took a 12x12 primed canvas...and layered it with wallpaper samples, and stitched on vintage BARKCLOTH couple...along with a vellum bible verse from my stash...some vintage lace and applique' cut from an antique wedding dress...along with antique mother-of-pearl buttons.
I started with the ULD MR&MRS and then went back with the  ULD curley corners and frames.


I painted and embossed the MR &MRS and decided to leave the swirly-o's "naked"....because this product stands beautifully on its's own!!
As a DT member, I receive product...however...I have to say...I am soooooooooooooo in LOVEEEEEE with Unique Laser Designs..that I have just placed an order ( and received lickety-split!) to use in many of my up-coming ART canvases and blocks for my shows!
The "cabinet card" is from the Tim Holtz line(uber fun!)...and works well with this vintage theme!
StudioBeeCreations is always available to do special works of art and one-of-a-kind gifties!
email me@ studiobeecreations@live.com


creative blessings,
debbie


Monday, April 14, 2014

Easter Candle Ring

I am super excited to bring you my first project as an official member of the Unique Laser Designs Design Team. And boy oh boy do I have a fun project for you.  How about an adorable candle ring with lots of bunnies and Easter eggs.

So let's get moving, and I'll show you how it was made.


I went through my stash of embossing powders and pulled out all the fun spring colors.  All but one piece on this candle ring was heat embossed.


 For this egg,I embossed the entire egg in a pastel purple, the added a layer of embossing glitter around the edges.


As you can see, I love to add glitter and bling to my projects.  It's a rare day that I make a project that doesn't have shine and shimmer on it somewhere. :)


The rabbits were also embossed.  For these guys, I added several layers of embossing since I wanted a bit more texture.


To finish the rabbits, I added a bit of Smooch ink to the nose, a crystal to the center of the flower, then a pom-pom to make a super cute fuzzy tail.


This is the one piece that is not embossed.  I simply inked up this adorable bunny with spray ink, then with a layer of shimmery ink.


Now it's time to start adding on the finishing pieces.  Each egg was decorated differently, some with flowers, some with crystals, some with buttons.


As for the bunny, I simply adhered a small butterfly. Then, it's simply a matter of attaching the pieces together.  I used a hot glue gun and simply attached all the pieces together in a ring shape.


How cute is this? A perfect way to create a centerpiece for your table.


One word on safety...the pieces are made of wood which are highly flammable.  If you are using a candle with a flame, be sure to remove the candle ring while burning the candle.


If you're using a flameless candle, then there's really no need to remove the ring while the candle is lit.