Hey everyone! Today is my last post for ULD....I only signed on for the fall term, but I've loved every minute of it! I'm a little sad, but I'm a fan of wooden embellishments, and will definitely be sharing more projects using ULD on my blog and the ULD facebook page!
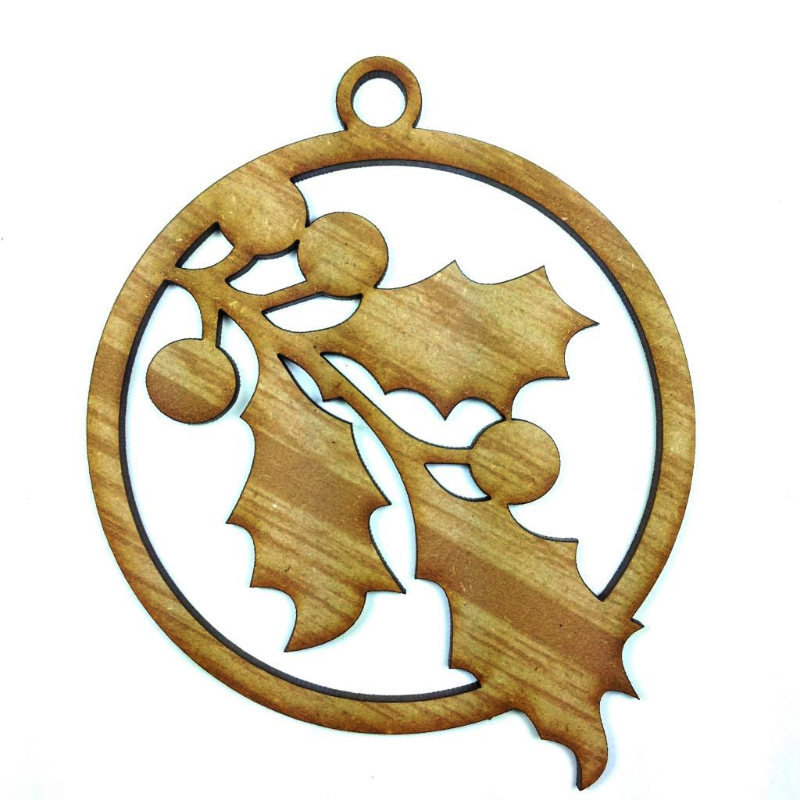
I've got a great little gift idea, or just something to pretty up your own holiday using this holly ornament:
X-0058 Holly Ornament 3½”x4”
Here is my Holly Shaker Ornament:
I've used a tacky type glue that dries clear, but stays sticky, brushed over the top:
Then I added glitter to the holly leaves and berries.
Next I traced the ornament on a piece of acetate (I used packaging from craft supplies that I've saved) then cut it out. I did this twice. Then I applied a thin line of glue around the edges and adhered the acetate to one side (you can see a slight outline on the left....that is one of the acetate circles):
then, before I glued the other side, I added some glass beads and then glass glitter around the edges.
The final ornament just needs a cord (they come with these!!), and it's ready to give!
Thanks for stoppin' by today!! Get inspired to get those gifts made!
Showing posts with label glitter. Show all posts
Wednesday, November 26, 2014
Monday, November 17, 2014
Winter Getting You Down? Shake It Off!
Brrrrr! Hello everyone, it's Renee from Scrap Owl back with today's creation inspiration!
The snow is starting to stick on the ground and I'm none too happy about it. See, even living in northern Illinois I can admit that winter is not something I look forward to. Yes, we have snowmobiling, and sled mountains, and ice skating, but we also have cold. Bone chilling cold. Why can't we have all the fun and none of the cold? Well, my project today, I did just that!
By cutting out the bell inside the globe, I now have two pieces that I can use for my cards or layouts. Additionally, it opened up space to make a shaker card! If you haven't seen these yet, they are extremely popular right now. I actually had the chance to talk with Paulina Nakamura from Pretty Pink Posh who, some say, is the mother of the shaker card movement.
I primed the snow globe with some white paint for the globe part and some black paint for the base. I then went back and added a coat of Imagine Crafts Clear Creative Medium for shine. On the bottom, I only applied the medium, but on the top I mixed in some subtle sparkle.
To make this shaker card, I stamped a sentiment on top of a piece of vellum and attached that to the underside of the chipboard snow globe. Then I applied foam tape to the back of the chipboard to make the snow globe pop off the page a bit. This step is crucial for a shaker card. You need to give the sequins enough space to wiggle and jiggle.
For this card I used Paulina's Marshmallow sequins. They have just the right amount of shine to mimic snow. I flattened them into a small group and then attached the snow globe right on top of them.
For the base of the card, I used the a-side of Merry Christmas from Moxxie's Happy Pawlidays collection. I also stamped some small snowflakes around the snow globe and embossed them with a pearl shine.
I simply love the way this card came out and hope you do, too! Also, I'm looking forward to sharing with you what I do with the bell that originally came with the snow globe!! Stay tuned!!
Stay Scrappy My Friends,
The snow is starting to stick on the ground and I'm none too happy about it. See, even living in northern Illinois I can admit that winter is not something I look forward to. Yes, we have snowmobiling, and sled mountains, and ice skating, but we also have cold. Bone chilling cold. Why can't we have all the fun and none of the cold? Well, my project today, I did just that!
Snow Globe Shaker Card
I created my snow globe shaker card using the the Snow Globe - Bell die cut. This particular die cut was made from chipboard, but it is also available in the medium density fiberboard (MDF). I used a tip that I gleaned from Kisha Walton during our Scrap Owl Podcast interview where she told me that you can stretch your Unique Laser Design pieces by cutting them up. It got me thinking.... "do you wan to build a snow globe?"By cutting out the bell inside the globe, I now have two pieces that I can use for my cards or layouts. Additionally, it opened up space to make a shaker card! If you haven't seen these yet, they are extremely popular right now. I actually had the chance to talk with Paulina Nakamura from Pretty Pink Posh who, some say, is the mother of the shaker card movement.
I primed the snow globe with some white paint for the globe part and some black paint for the base. I then went back and added a coat of Imagine Crafts Clear Creative Medium for shine. On the bottom, I only applied the medium, but on the top I mixed in some subtle sparkle.
To make this shaker card, I stamped a sentiment on top of a piece of vellum and attached that to the underside of the chipboard snow globe. Then I applied foam tape to the back of the chipboard to make the snow globe pop off the page a bit. This step is crucial for a shaker card. You need to give the sequins enough space to wiggle and jiggle.
For this card I used Paulina's Marshmallow sequins. They have just the right amount of shine to mimic snow. I flattened them into a small group and then attached the snow globe right on top of them.
For the base of the card, I used the a-side of Merry Christmas from Moxxie's Happy Pawlidays collection. I also stamped some small snowflakes around the snow globe and embossed them with a pearl shine.
I simply love the way this card came out and hope you do, too! Also, I'm looking forward to sharing with you what I do with the bell that originally came with the snow globe!! Stay tuned!!
Stay Scrappy My Friends,
Wednesday, November 5, 2014
A very sparkly season
Once Halloween passes, I head right into the sparkle. I don't forget about Thanksgiving, but while my mind is focused on being grateful, my hands are busy creating for the Christmas season. And for me, this season gives me the go-ahead to sparkle sparkle sparkle.
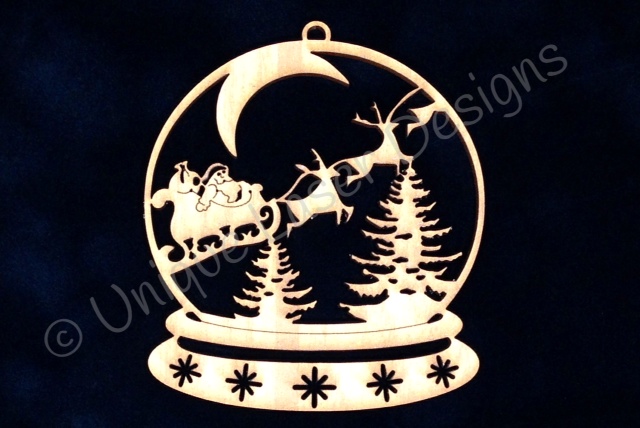
My first sparkly project of the season uses this wooden snow globe from Unique Laser Designs as the main focus of an over-sized tag. I spread a thin layer of Tacky Glue over the whole ornament (the end of a paper clip works great for moving the glue out of the intricate designs) and then sprinkled on a heavy load of ultra-fine platinum silver glitter. I added a red ribbon to the top too.
For the base of this tag (which is 4"x5"), I covered it in white cardstock and then punched out all different sizes and shapes of snowflakes from the same white cardstock and glued them on closely and randomly. I even let some hang over the edge and then trimmed them later when I had the whole tag covered.
I framed the edge with some black and white polka dot washi tape and added some die-cut trees that I "snow-swiped" with Picket Fence Distress Stain.
I glued the snow globe to the tag along with some song lyrics and now this tag is a perfect addition to a simple hostess gift (maybe on a bottle of wine?).
Wishing you lots of crafty time as we begin these seasons of being grateful and being sparkly!
Monday, June 23, 2014
Welcome - Altered Tile
Welcome back! Today I have another wonderful project using Unique Laser Designs wood embellishments. Lots of color and texture come together to create a unique home decor project. For this project, I used a 6x6 stone tile as my based.
To start, I painted the entire surface of the stone with a tinted glaze. Once the glaze was dry, I added different colors of ink to give a marbled effect.
Next, I used a stencil and modeling paste to add a layer of texture to the tile. While the paste was still wet, I sprinkled it with glitter. Every project must have a bit of sparkle.
Once the modeling paste is dry, I added some ink to give the tile more color.
Now on to the embellishments. I used a mixture of alcohol inks, Stickles, and dimensional paint to add color to my ULD embellishments.
Now it's just a matter of pulling everything together. I added a couple strips of washi tape to the bottom, adhered all of the wood embellishments, then layered on the flowers.
A wonderfully simply project with striking effect. Now I have something to display in my home to welcome guests.
Sunday, June 1, 2014
Remember 2 Dream Canvas
It's the first of the month once again, which means it's time for a new challenge at Scrap It Girl. The theme for June is wings, and I have a super fun and colorful project that fits the bill perfectly. How about a canvas full of mixed media pastes, sequins, and lots of Unique Laser Designs embellishments.
So let's get going, and I'll show you how it was done.
I'll start by apologizing because the first picture I took wouldn't transfer from my camera. However, what I did was lay a stencil on the canvas and apply a light coat of modeling paste with a trowel. I then let the canvas dry overnight. When the modeling paste was dry, I added lots and lots of color with my spray inks. Just keep adding color until you're happy with the result. There is no right or wrong on this.
Now, to work on the embellishments. I added a Glimmer Glaze to a canvas heart and alcohol ink to a set of wings.
Back to the canvas, I added a strip of washi tape to the bottom, lots of sequins along the right side, and a transparency across the middle. I added a bit of glitter glue to the letter E to make it stand out a bit more.
I finished the heart by stamping a couple of flourishes and adding a layer of glass bead gel medium. then I attached the heart to the wings then attaching a pin and gem to the bottom.
Next up, I added several dragonflies that were colored with Distress Ink.
Lastly, I added a Grungeboard number that was colored with glitter glue and the word dream which was sprayed with Glimmer Mist. Lots and lots of shimmer and shine :)
Labels:
dragonflies,
dream,
flourishes,
glitter,
heart,
home decor,
Wings
Tuesday, May 27, 2014
Just a little sparkle
These one inch size letters in Cooper font from Unique Laser Designs are just the perfect size for these cards, and they are thin enough that they don't add a lot weight to the card. The card will still slide right into an envelope. I simply spread a thin layer of glue over the letter and then sprinkled on some micro-fine glitter.
The gray cards were stamped with clear ink and then heat embossed with white embossing powder, and the green ones were stamped with olive ink and then heat embossed with clear embossing powder.
So, are you like me?
Is just a little bit of sparkle and glitter enough for you?
Or, can you never have enough?
Tuesday, April 15, 2014
Hot Air Ballons are Hip, Hot, and Huge!
Trends, Fads, Hot, or in style.. which ever way you look at it.. Hot Air Balloons are totally hip.
I see them on fabrics, scrapbook paper, stickers, pins, stamp sets and of course Unique Laser Designs has a wood Hot Air Balloon embellishment that I just love! I want to put it on everything. So I did..
I made a tag, a mini album, and a wall décor project. I have also taught one class using the hot air balloons, and everyone wanted more. Here is a look at 3 of my projects I created using the Hot Air Balloons along with a few other embellishments from Unique Laser Designs.
I see them on fabrics, scrapbook paper, stickers, pins, stamp sets and of course Unique Laser Designs has a wood Hot Air Balloon embellishment that I just love! I want to put it on everything. So I did..
I made a tag, a mini album, and a wall décor project. I have also taught one class using the hot air balloons, and everyone wanted more. Here is a look at 3 of my projects I created using the Hot Air Balloons along with a few other embellishments from Unique Laser Designs.
| Here is my Glittered Up Hot Air Balloon, this hangs in my studio.. love all the Glitter~ |
| I used this Hot Air Balloon on a cover of a mini album, along with a set of the clouds & mini word art. I stamped, added texture and used paper for this balloon. |
| Here is a more detailed project. I used one of the ULD tags, 2 clouds, and another Hot Air Balloon. |
| Did you know ULD has wood stencils? Yep.. I used it on this tag.. love how thick I can make the details if I want.. or I can do less if I wanted, but I love the deep shape. |
| These are the ULD shapes I used on this project, along with the stenciled image. |
| I used my Rubber Café Glue and Glitter for the Balloon. |
Do you love the Hot Air Balloons too? If so stop over to the Unique Laser Designs shop and pick up a few.. you can't get just one.. because you will want at least two. Did I mention they are only $1 each? Yes.. how the heck can an embellishment this cute be only $1.. I just filled my cart with a few more since I have more ideas. What would you do with your balloon?
Here is the link to the
Thanks for looking at a few of my projects.
Subscribe to:
Posts (Atom)